Manage Notes
Notes are often added as part of the check-in queue process but can also be added and edited outside of a session, as explained in this guide.
Table of Contents
Adding Notes Outside of a Session
1
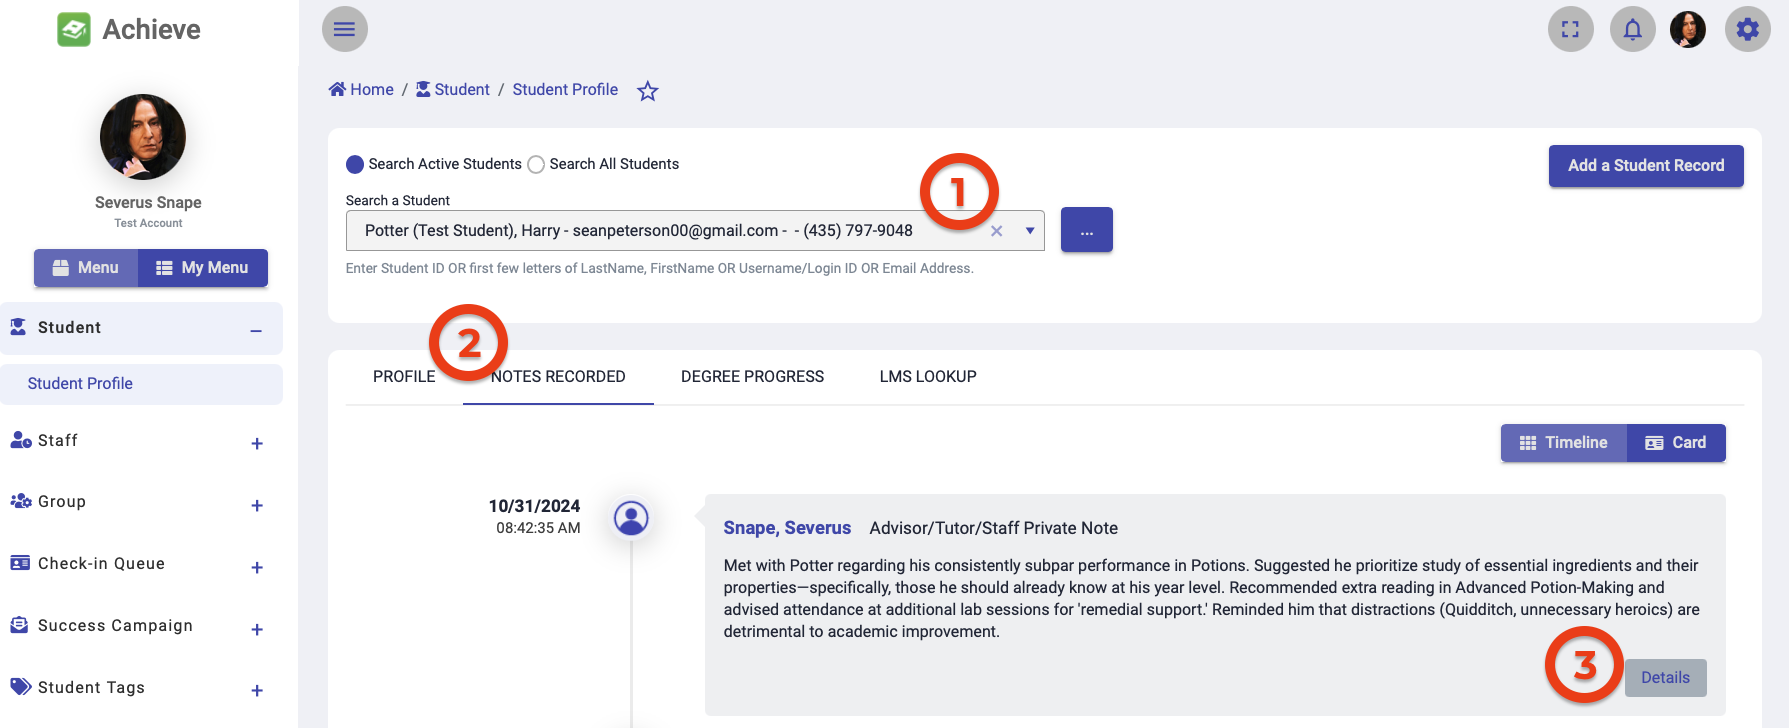
Click on the "Student" tab

2
Search for the student profile you want to add a note to
Use the student's A-number, name (last name, first name), or email address to search for them.
3
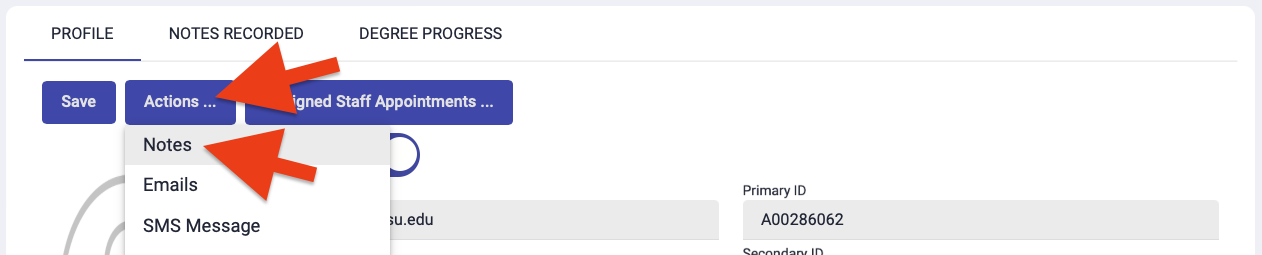
Select "Actions" then "Notes"
4
Select the type of note you want to record
- Program Note: Visible to staff who have access to the program the note is recorded under. These are similar to notes recorded in sessions through the check-in queue process. Program Notes require you to specify the department and program the note should be attached to.
- Advisor Private Note: Visible only to the staff member who made the note

Auditing and Editing Notes
1
View/audit your notes
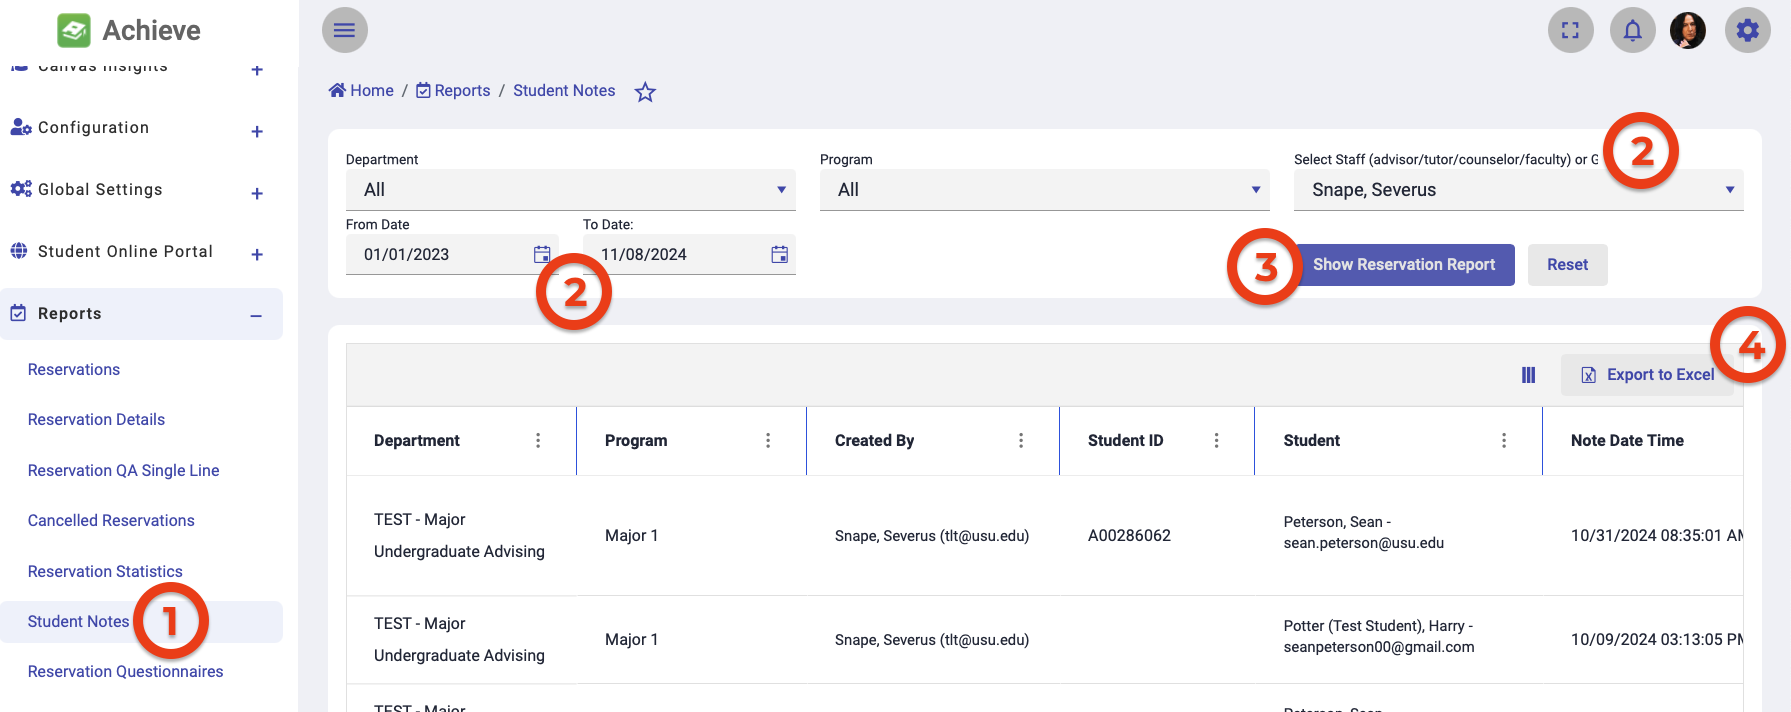
- Under the Reports tab, select Student Notes.
- Using the filters at the top of the page, select yourself under the Select Staff field then set a date range for the report.
- Click Show Reservation Report.
The report will show notes you have added in the system, along with when they were taken and for which student. - If desired, click Export to Excel to download the report.
2
Edit a note
- If you find a note that needs to be edited, pull up the students profile.
- Select the Notes Recorded tab.
- Find the note you need to edit and click Details.
- Edit the note as needed, then click Update Note.