Obtaining & Preparing a Contact List
Before importing contacts into Message, a list of contacts needs to be obtained and prepared. There are several ways an office may obtain this list. One is by pulling a report from Argos, the enterprise reporting tool at USU. Regardless of how the list is obtained, the data will likely need to be cleaned before being imported into Message.
This guide goes over both how to obtain a contact list from Argos and how to clean the data before importing it to Message.
Table of Contents
Exporting a Report From Argos
If you are unfamiliar with Argos, request access then check out the Argos Student Module Training.
Go to Banner and select the "Argos Reporting" link under "Evisions"
Banner can be accessed at banner.usu.edu. If prompted, sign in with your A# and password.
Locate the appropriate datablock for your needs, set your desired parameters, then run the report
To better showcase this, let's say we have a large list of individuals we want to message. If we have their A#s, a simple way of obtaining their phone numbers is by using the "STU Contact Info for Specified Anumbers" data block in Argos. Here's how we can do this:
- Under the "Student" folder in Argos, we'll select the "Administration" folder.
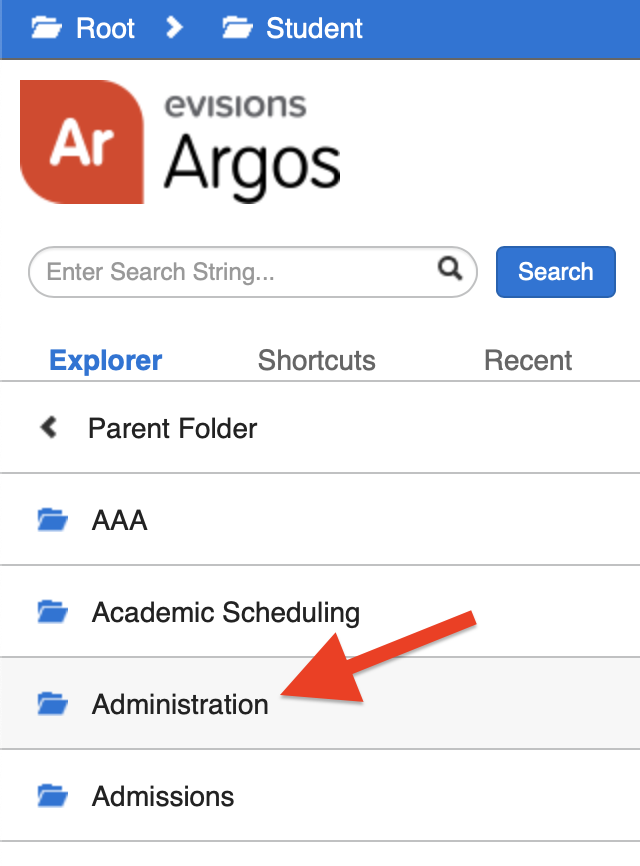
- Then we'll select the "STU Contact Info for Specified Anumbers" datablock.

- We'll then copy and paste the list of student A#s into the "Enter A# Field" ensuring that each A# is on a seperate line.

- After pasting in the A#s, we'll click the "Run" button to run the report.

Export the report
- Once the report has been run, select the gear icon in the lower right of the report, then select "Export All to CSV."

- Select the columns you'd like included in the export then click "Apply."

The .csv file will be downloaded to your device.
Open the file in Microsoft Excel
Congratulations! You're ready for the next step: Cleaning Up a Contact List. Learn how to do this below.
Cleaning Up a Contact List
Start with a .csv file containing the contacts you'd like to upload into Message
You may already have a .csv file obtained from Argos or somewhere else. If you are starting from scratch, it's fine to start with a normal excel spreadsheet, just save it as a .csv file before uploading it to Message. To save an Excel spreadsheet as a .csv file:
- Click "File" > "Save As" in Excel
- Click on the "Save as type" or "File Format" dropdown and select the .csv file format.
- Click "Save"
Ensure the .csv file includes these required fields (columns):
Required:
- customer_id (A-number)
- first_name (the first name of the contact)
- last_name (the last name of the contact)
- phone (the mobile number of the contact)
Optional:
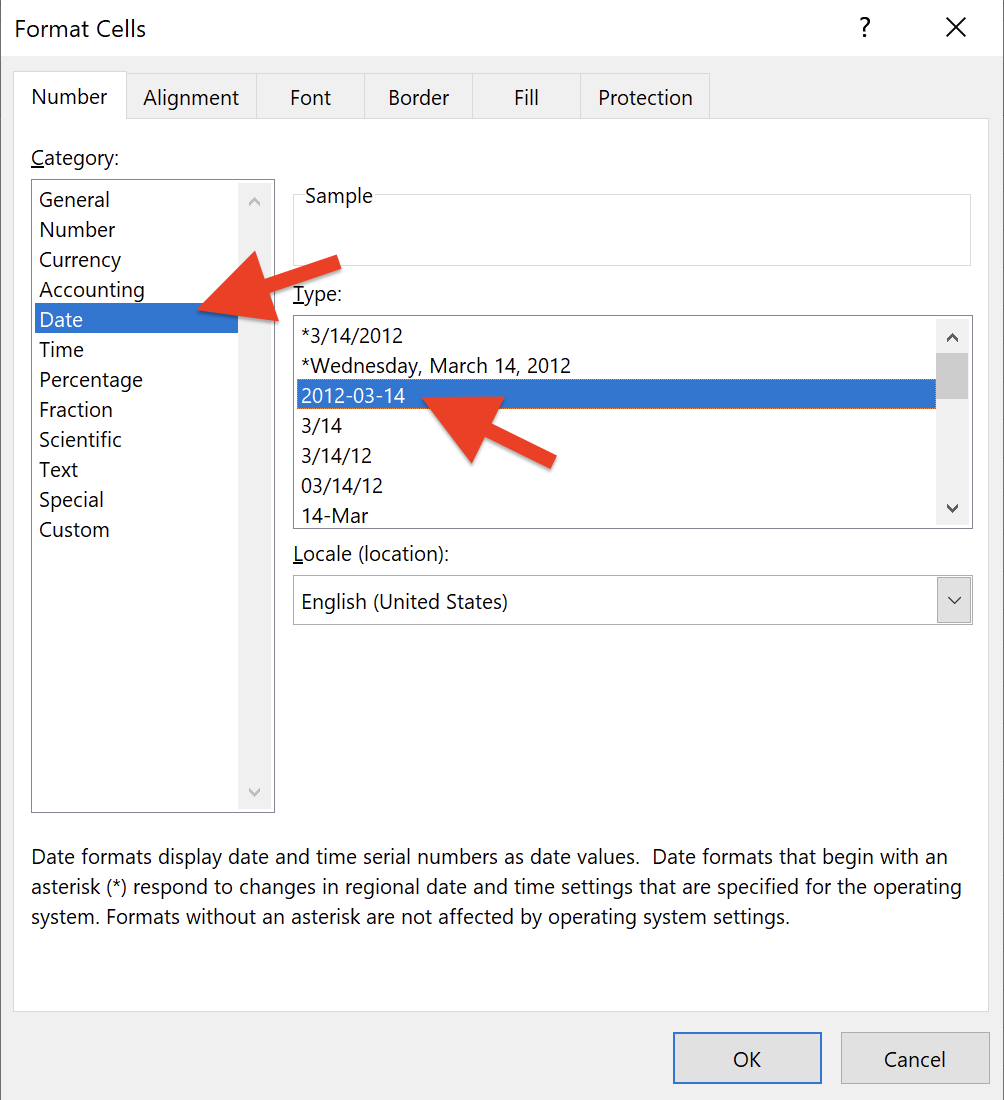
- update_date (the date the individual was last updated in Message
- This must be entered in the following format: "YYYY-MM-DD." To do this in Excel:
- Select the update_date column (or any column with dates).
- On the "Home" tab, select the drop down arrow in the "Number" section.

- Select the Date Category then the YYYY-MM-DD type (i.e., "2012-03-14").
- This must be entered in the following format: "YYYY-MM-DD." To do this in Excel:
- group_list (a column that can be used to group contacts)
Example:

- Column headings must be labeled exactly as displayed above.
- It does not matter what order the columns are in, as long as the column headings are labeled correctly.
Add additional custom fields as needed (optional)
Additional custom fields may be useful in filtering contacts to message. For example, a custom field could be created to show which students have registered for an upcoming semester. The field could then be used to message only students who have not yet applied for that semester.
You can include as many custom fields as you would like, as long as those fields have been created in Message beforehand. To create new custom fields in Message:
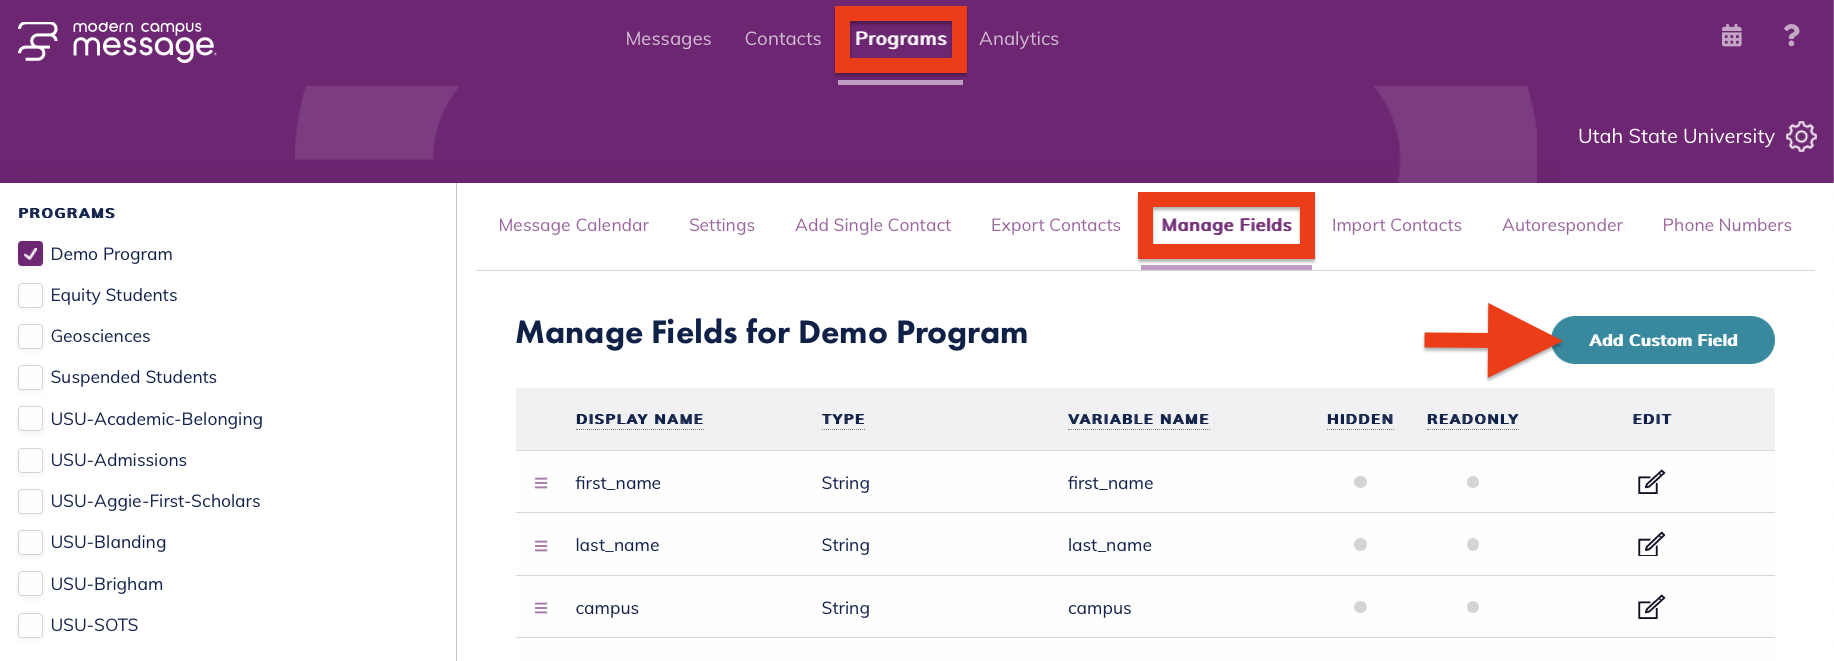
- Select "Manage Fields" under the "Programs" tab
- Ensure the correct program is selected under the listed Programs on the left
- Click the green "Add Custom Field" button
- Add a "Field Name" and select a "Field Type" then select the green "Add Field" button.
Column headings for custom fields in a .csv file must match exactly the "Field Name" entered into Message for that field.
Check for bad/missing data
Once all of your columns are in place, check for the following in order to prevent errors when importing your contacts into Message:
- All column headings are lowercase, do not include spaces or special characters, and match the field names in Message
- Dates are entered in the following format: YYYY-MM-DD
- No contacts are missing A#s or phone numbers
- There are no duplicate A#s or phone numbers
Next Steps
Now that you've learned how to obtain and prepare your .csv file, learn how to upload the file into Message.