PDF Accessibility
The PDF file type was created to preserve formatting across platforms and software. This makes PDFs difficult to edit or change. From an accessibility standpoint, it’s better to keep files in their original formats (such as Word Documents and PowerPoints) whenever possible. If that’s not an option, you can use these resources to make new and existing PDFs as accessible as possible.
Creating New PDF Files
If you’re creating a new PDF, make sure the source document is accessible. From there, you can convert the file, and its accessibility features will be carried over to the PDF. Check out these instructions for creating accessible documents in some common formats:
Once a document has been made accessible, it can be saved as an accessible PDF.
- Choose File > Save As.
- Expand the “File Type” dropdown and choose “PDF (.pdf)”.
Note: Do not use export widgets or plugins, as they don’t preserve the tags needed for PDF accessibility.
Editing Existing PDF Files
If you don’t have access to the original file, use this guide to work with the PDF itself. Keep in mind that most of these adjustments can only be made to high-quality PDFs. Scanned PDFs can’t be made accessible without starting the process from scratch. If you aren’t sure if your PDF is high-quality, check this Adobe overview for the standards you should be looking for.
The following instructions are for making adjustments to PDFs using Adobe Acrobat DC.
Open the PDF in Adobe Acrobat and Use the Accessibility Checker
Note: Make sure your Adobe Acrobat software is updated to the newest version. Otherwise, these steps will be difficult to follow and may be different on older versions.
The accessibility checker can be accessed from the toolbar on the right side menu or from the “Tools” tab located at the top of the page. If you do not have Adobe Acrobat, you can request it via the Adobe Creative Cloud Request form. Adobe Creative Cloud is free through the University.
- In Acrobat, go to See All Tools, then select Prepare for Accessibility.

- If the Prepare for Accessibility option doesn’t show up in the right toolbar, then it may need to be added. To do this, search for “Accessibility” and click open. This will add it directly to the toolbar on the right-hand side.

- If the Prepare for Accessibility option doesn’t show up in the right toolbar, then it may need to be added. To do this, search for “Accessibility” and click open. This will add it directly to the toolbar on the right-hand side.
- Select the file you want to edit.
- In the left toolbar, select Check For Accessibility.
- A pop-up box will appear. Make sure all the boxes are checked under the Checking Options section.

- Then select Start Checking.

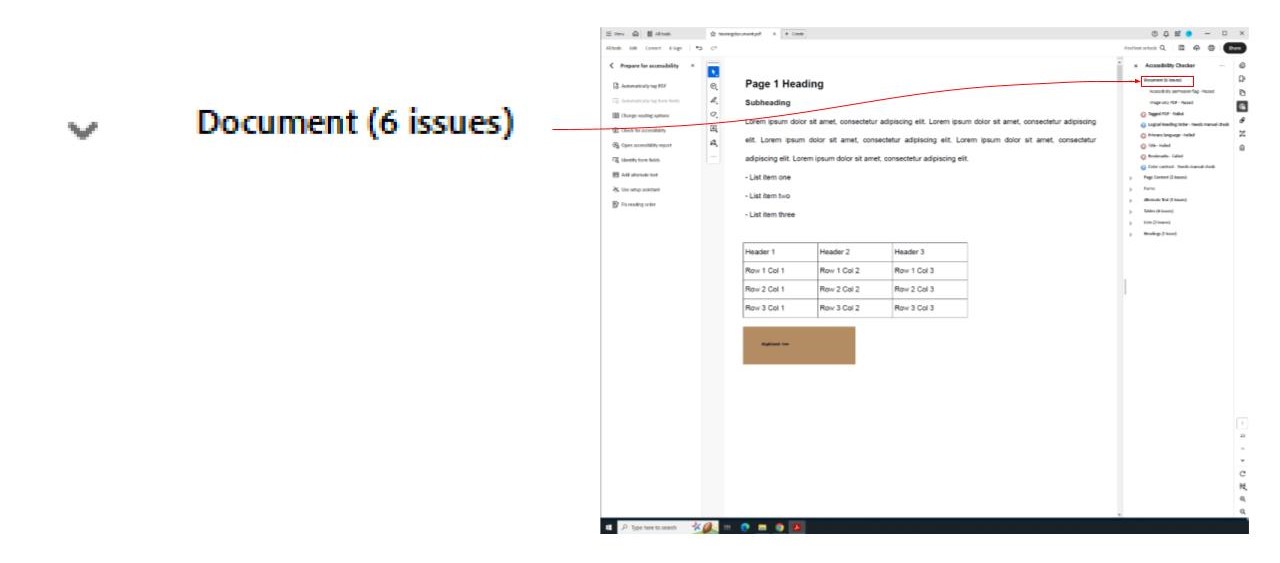
- A sidebar labeled Accessibility Checker will appear on the screen with all the issues in the file.

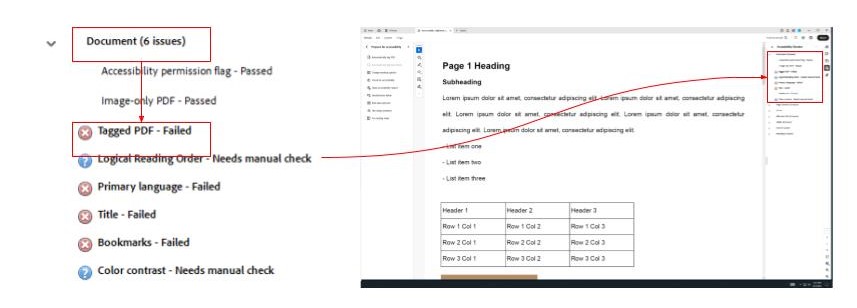
- Click the Documents drop-down menu.
- Each issue will be preceded by a small red or blue icon. Any issues that aren’t found will be followed by the word Passed.
- You can get more information on any of the items in the list by right-clicking the the issue and then selecting “Explain.”
- You can now go down the list of issues and edit the document. A list of possible issues and the steps to solve them can be found below.
List of Possible Accessibility Check Issues
Tagged PDF Order
Tags are labels that define the different types of content in the documents. They make the document usable with screen readers.
Note: The following tags will be used most often in the document: The H1 tag should be reserved for the document title. Headings from H2 to H6 should follow a logical, chronological order. Regular body text should be enclosed in the P tag. For lists, use ol for ordered lists and ul for unordered lists, depending on the content
Occasionally, Acrobat will misidentify tags in a document. Most times, these issues should be fixed before any other accessibility problem can be solved.
- These issues are labeled as “Tagged PDF” under the “Document” drop-down menu in the Accessibility Checker on the sidebar.
- Select the tag icon in the Navigation Pane (this is the bar to the side of the Accessibility Checker tool bar). A list of the tags in the file will be shown (there may not be any tags in the document).
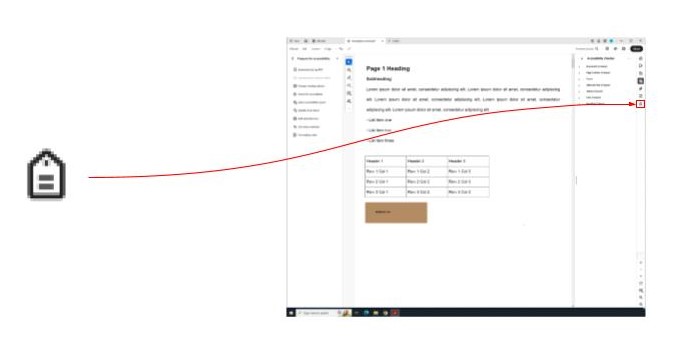
- If this icon isn’t visible, right-click on an empty part of the Navigation Pane and select the tag icon from the list that pops up.

- If this icon isn’t visible, right-click on an empty part of the Navigation Pane and select the tag icon from the list that pops up.
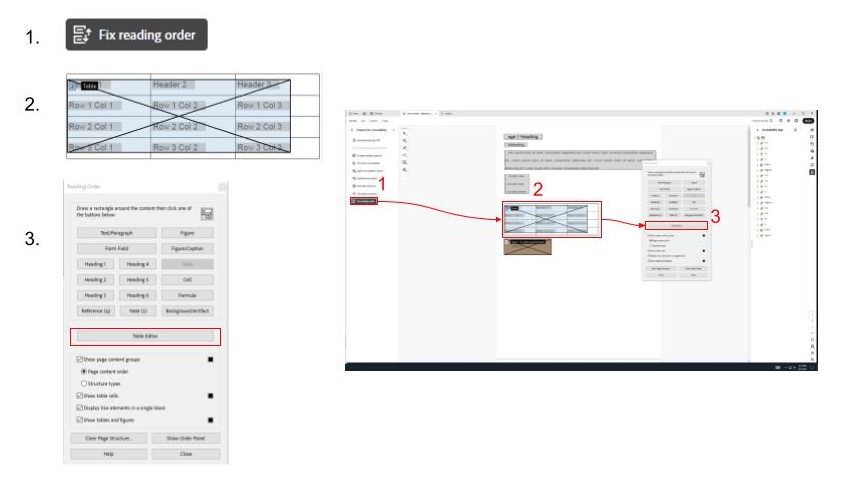
- If the tag type needs to be changed, go to Fix Reading Order under the Prepare for Accessibility pane.

- A Reading Order pop-up box will appear.
- Draw a box around the area that needs re-tagging, from there you will be able to select the correct tag for the highlighted section.
- Then select “Close.”

- An example would be that images are tagged with the “Figure” button, tables with the “Table” button, etc.
- Make sure the tags are in the order in which the document should be read.
Reading Order (Tag Order)
Sometimes the PDF will have an automatically assigned reading order. This means that the order that the tags show up in the Tags section of the Navigation Pane are the order that a screen reader will read them in. Review the tags to make sure they are in the correct order.
- Go down the list and click on each tag.
- When the tag is selected, a pink box will highlight the content that is tagged.

- If the tags are out of order, select the tag you would like to move and drag it to the position you want it to be in.
Title
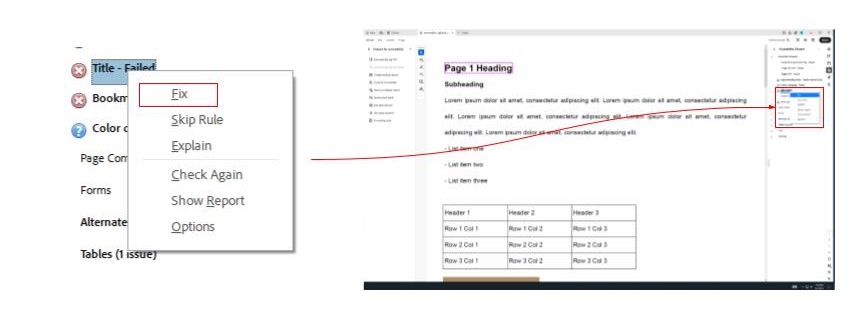
- Go to the title issue under the Document drop-down menu.
- Right-click the “Title”.
- Select “Fix”.
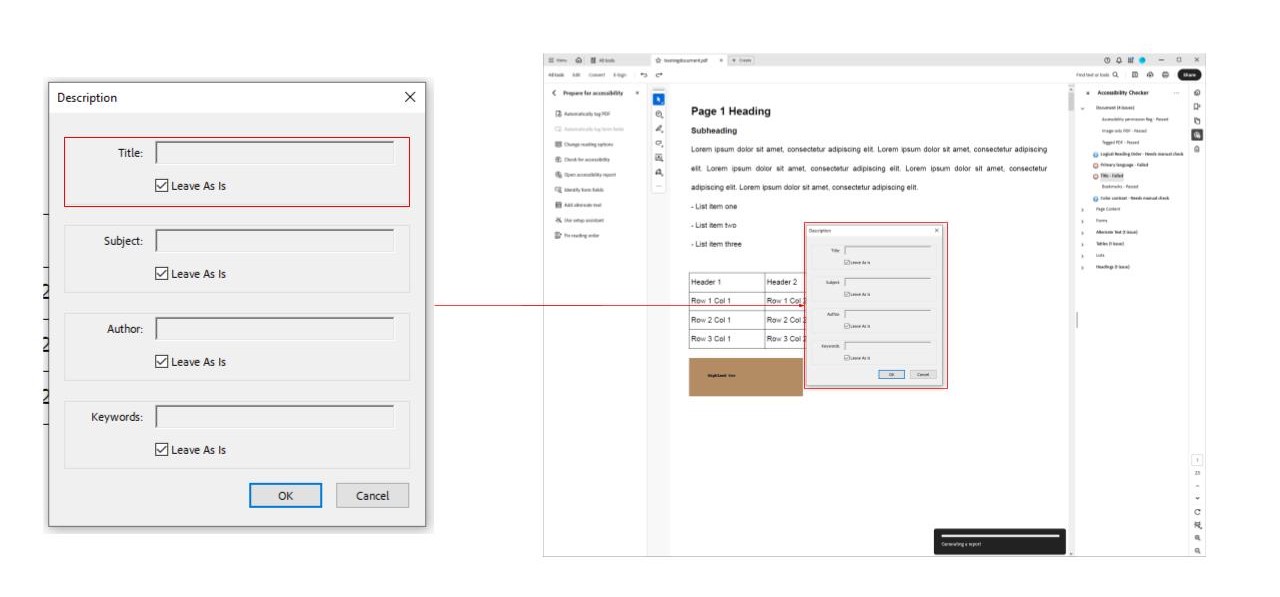
- A pop-up will appear. Deselect Leave As Is and then type in the title of the document.
Occasionally, the Fix option won’t automatically solve the issue. To solve this problem, follow the steps below.
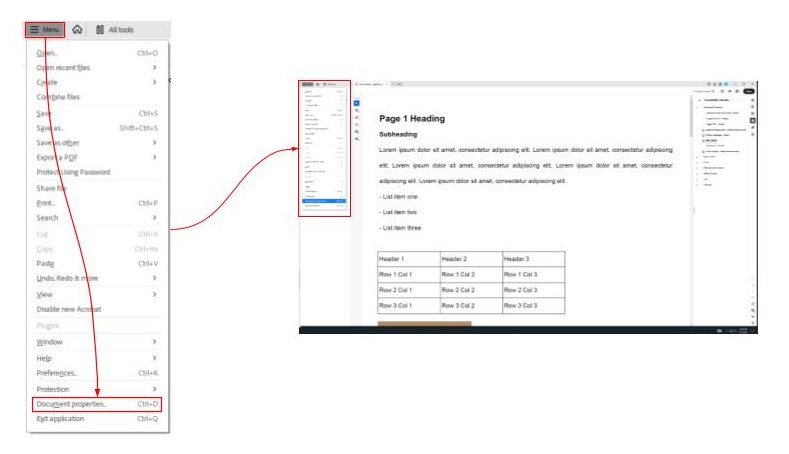
- Select the Menu option (three dashes) in the upper left-hand corner and click on Document Properties (Ctrl + D).
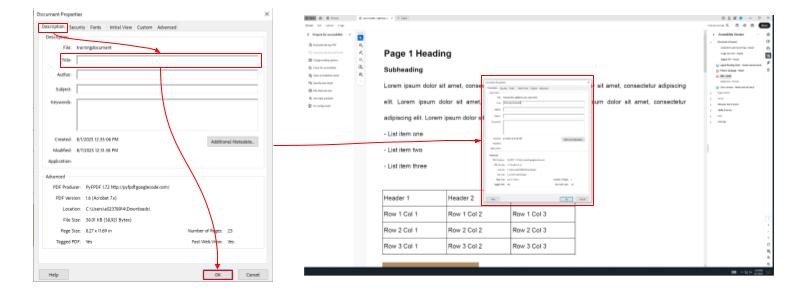
- A pop-up will appear, and you will be able to type in the title in the Descriptions Tab in the Title bar.
- Click OK.
Language
- Right-click the Language option under the Document drop-down menu.
- Select Fix.

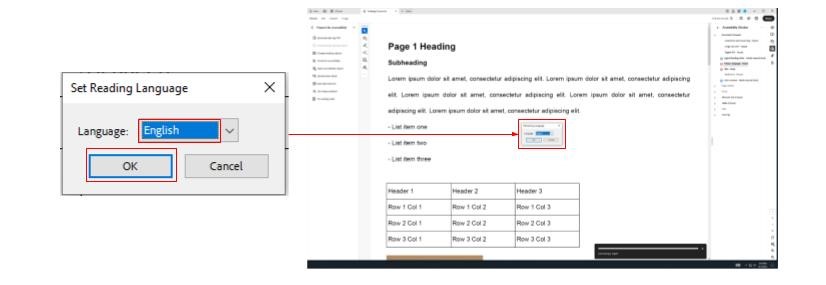
- Choose the correct language in the pop-up bar.
- Select OK.
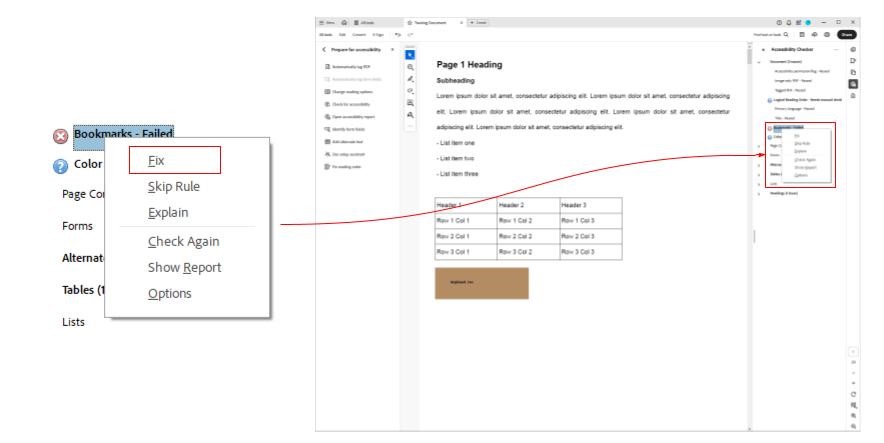
Bookmarks
- Before fixing these errors, make sure the document is fully tagged. Otherwise, there won’t be any bookmarks to fix.
- Right-click the Bookmarks option under the Documents drop-down menu and select Fix.
- A pop-up menu will appear. Choose Select all and then OK.
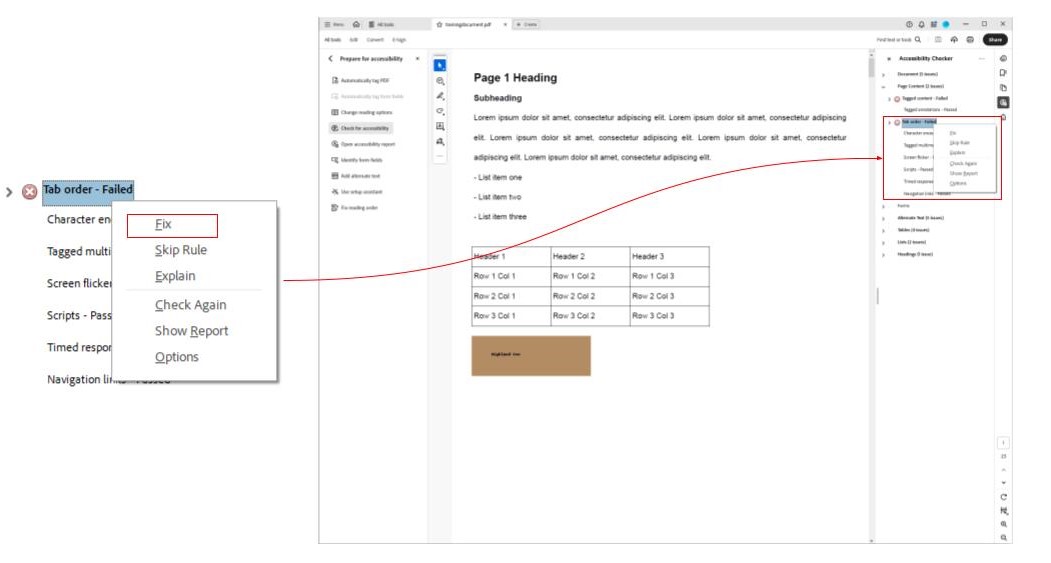
Tab Order
The tab order is what allows a user to use the “Tab” key to navigate through a file. It will appear under the “Page Content” section of the accessibility checker.
- Right-click and select Fix.
If that doesn’t work or if you want to reorder the pages, then follow the steps below.
- Select the Pages icon (the icon with two pages).
- Then drag and drop the pages where you would like them to go.
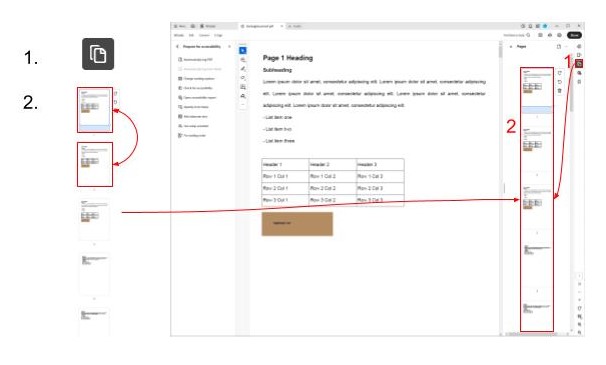
- The reading order and the tag order will adjust automatically.
Alternative Text
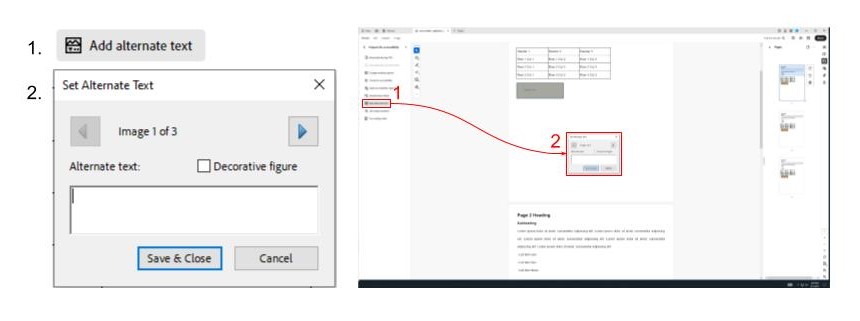
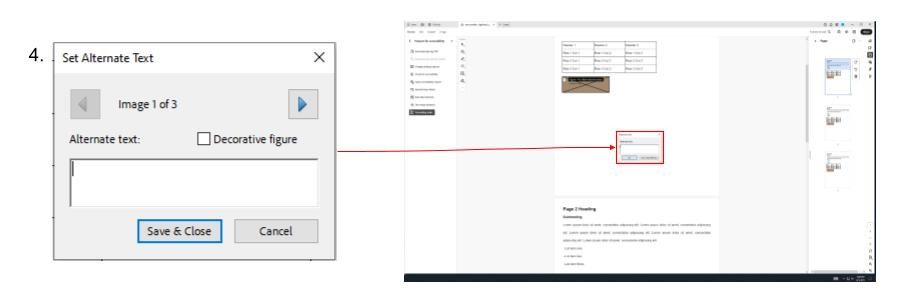
Alternative text (alt text) is a text description of an image. This is read by assistive technology, such as screen readers, for users who are blind or have low vision. When adding alternative text, keep it concise and relevant to the document’s context. Describe what’s essential about the image—avoid phrases like “image of” and make sure to end in punctuation. If you’re unsure about what to say, you can use generative AI (ChatGPT, Gemini, etc.) for ideas. To add alt text to an image:
- Go to the Alternate Text option under the Accessibility Checker sidebar.
- A pop-up text box with arrows leading to each image in the PDF will appear.
- Add alt text for each image inside the dialogue box.
- Select Save & Close.
If this doesn’t work, then follow the steps below:
- Go to Fix Reading Order.
- Right-click each figure and select Edit Alternate Text.

- Then add alt text in the pop-up text box.
- Select OK.
Tables
Tagging tables helps screen readers identify them; however, further steps should be taken to help identify other parts of the tables, such as headers. If these other steps aren’t taken, issues will appear in the accessibility checker under the Tables tab as Headers.
To fix a table header problem:
- Open the Fix Reading Order tool and make sure the table is tagged as a table.
- Click the Table Editor button found near the center of the Reading Order window.
- Highlight the table cells that are headers. After they are highlighted, the cells should be outlined in a blue box. Then right-click the cells and choose Table Cell Properties.
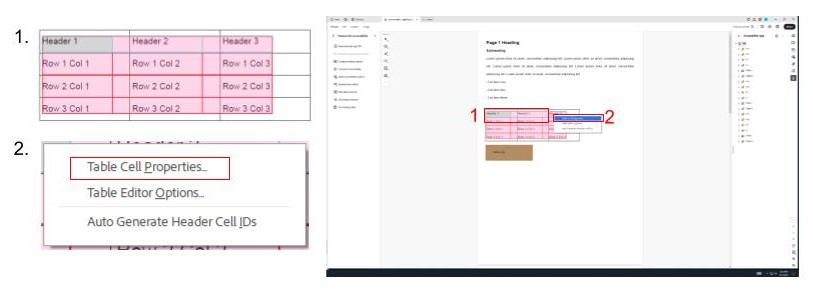
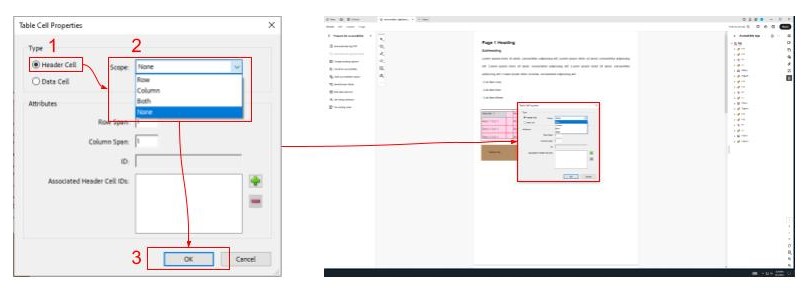
- In the window that opens, change the Type from Data Cell to Header Cell.
- Select the scope for those cells. Either Rows or Columns (Rows define a horizontal set of data while columns define a vertical set of data).
- Click OK.
Note: If an alert pops up next to the summary option under the tables drop-down menu, this is a section where you can summarize the data in your table. You can skip this step as it is not necessary; however, if you would like to add one, feel free to do so.
A table summary should explain the content of the table. If the table is missing a summary, then it will cause an error. To fix this:
- Open the Reading Order tool.
- Right-click on the table and choose Edit Table Summary. The summary can be added in the window that pops up.

Lists
Lists need to be formatted correctly for screen readers to read them as lists. Otherwise, they are read as regular text.
- Go to the Tags icon in the Navigation Bar.
- Double-click on the tag that is supposed to be a list.
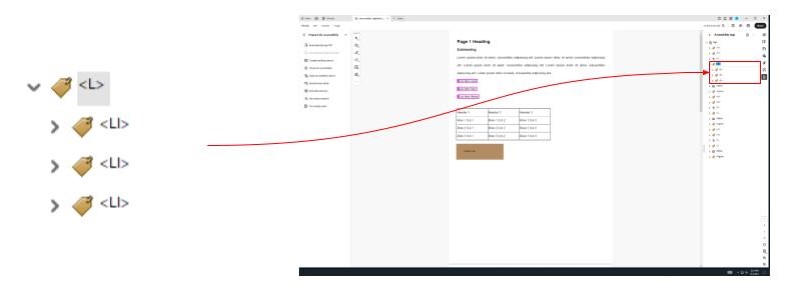
- Tag the entire list with the List tag (L).
- Then tag each individual list sub-item with a List Item (LI) tag.
- Watch this video walkthrough from KSU for more detailed instructions.
Note: Ordered lists (numbered) use the tag OL, and for unordered lists (bullet points), the tag is UL. All list items will be tagged LI.
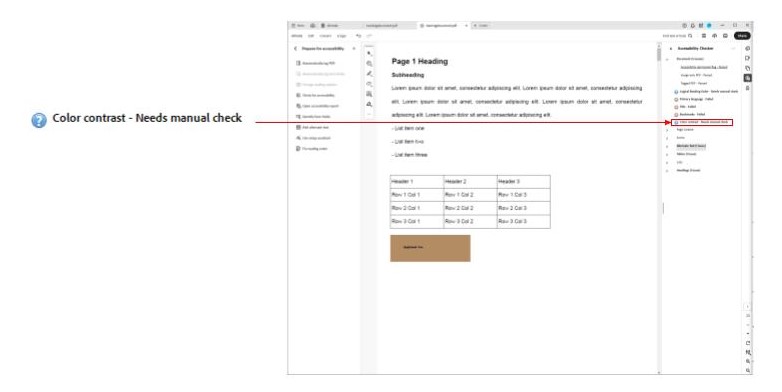
Color Contrast
Color contrast will always show up as a blue icon error. This means that Acrobat wants you to manually check if there’s an issue. You can generally ignore any color contrast issues.
Ignore Warnings for Logical Reading Order
If Acrobat flags Logical Reading Order, ignore these warnings.
Save and Recheck
After fixing issues, Save the file, then re-run the Accessibility Checker to confirm all items are addressed.