
Laptop Connections
Laptop connections allow one to connect a laptop to display on a projector or TV in a classroom. While most classrooms have a classroom computer in the room that can be used to instruct from, a laptop may be useful to display specialized software that is needed for a class or just because one is more comfortable with a laptop.
Select the connection you are interested in learning about.


- Check out our Frequently Asked Questions on laptop connections.
- Contact us
External link or schedule a trainingExternal link .
HDMI
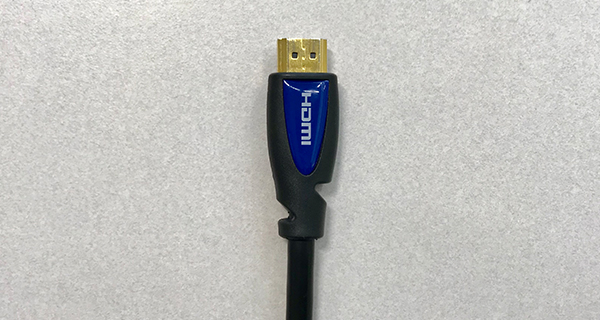
HDMI is the preferred laptop connection at USU. It carries both HD video and audio that produces the best quality in the classroom.
Select Laptop on the classroom touch panel.
Plug the provided HDMI cable into the laptop's HDMI port.
AirMedia
AirMedia is the wireless laptop connection standard at USU. It allows laptops to connect to classroom systems wirelessly.
Select AirMedia on the classroom touch panel
An AirMedia page should appear on the projector/TV. Notice the IP address on the top left of the screen and the code on the top right.
Open any browser on the laptop (Chrome, Firefox, etc.) and type in the AirMedia's IP address then press enter
Download the appropriate client for Windows or Mac
Open and run the downloaded AirMedia application
AirMedia should open automatically once installed. When it does, a login page will appear.
Type in the code found on the AirMedia screen then press "connect."
Zoom Rooms
Zoom Rooms use a wireless laptop connection offered through Zoom. It allows laptops to connect to classroom systems wirelessly.
Select Share Content on touch panel
A screen like the one below should appear on the screen. 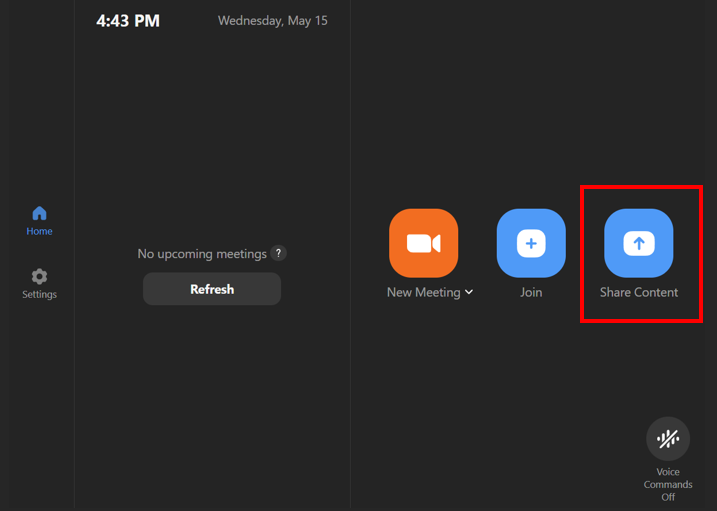
To connect the laptop, follow the instructions listed under the Use Browser section.
There are very few occasions where this option will not load. If 'Use Browser' doesn't work, skip to the next step. 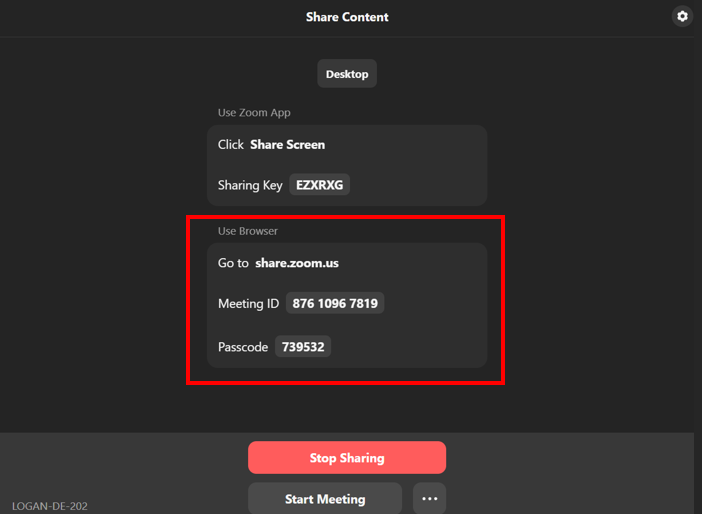
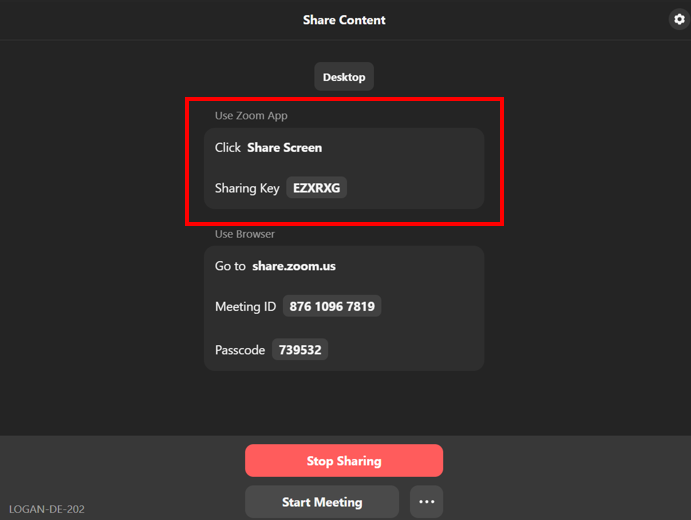
In the event 'Use Browser' does not work, open the Zoom application on your device and follow the instructions listed under the Use Zoom App section.
Share MacBook Audio in Zoom Room
On the classroom touch panel, tap Share
Open the Zoom Workplace application
Click Share screen
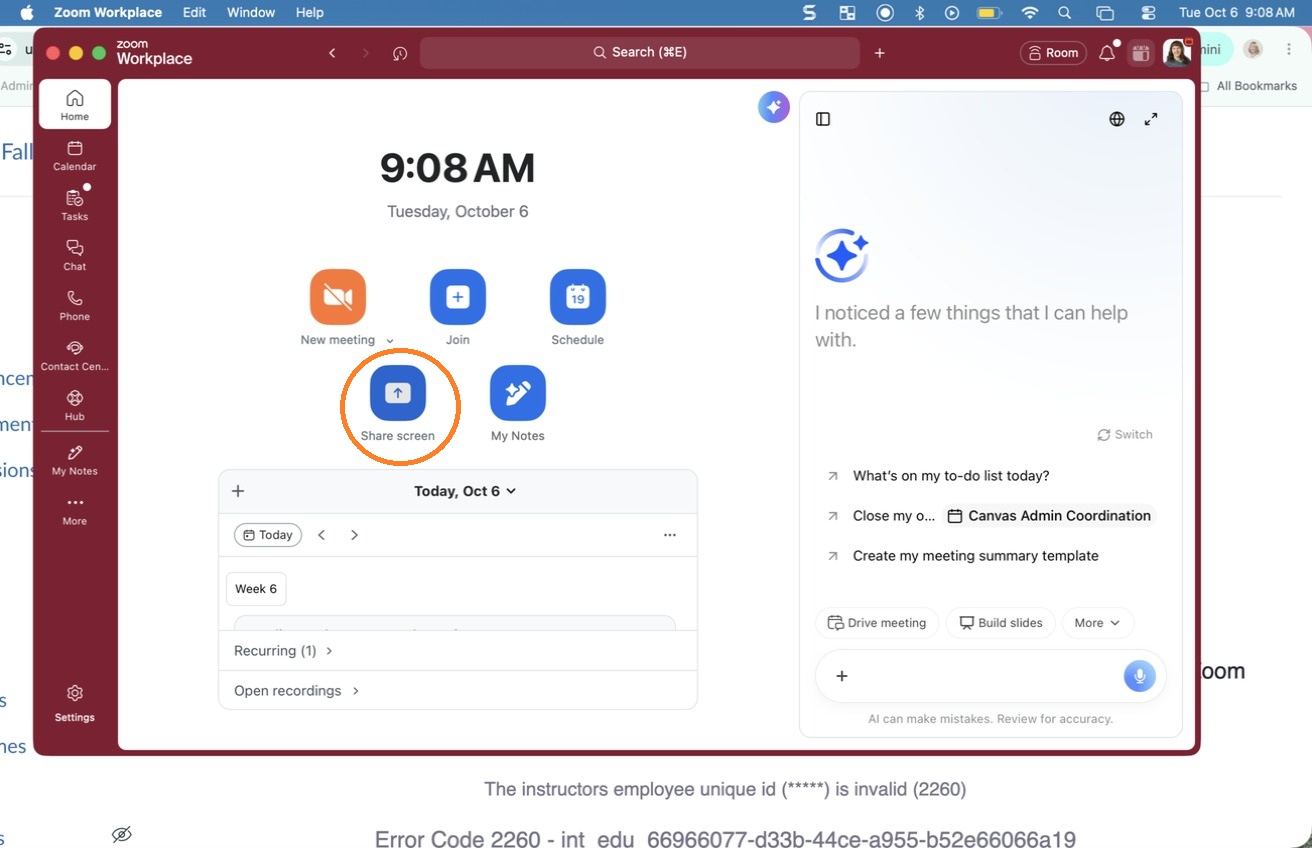
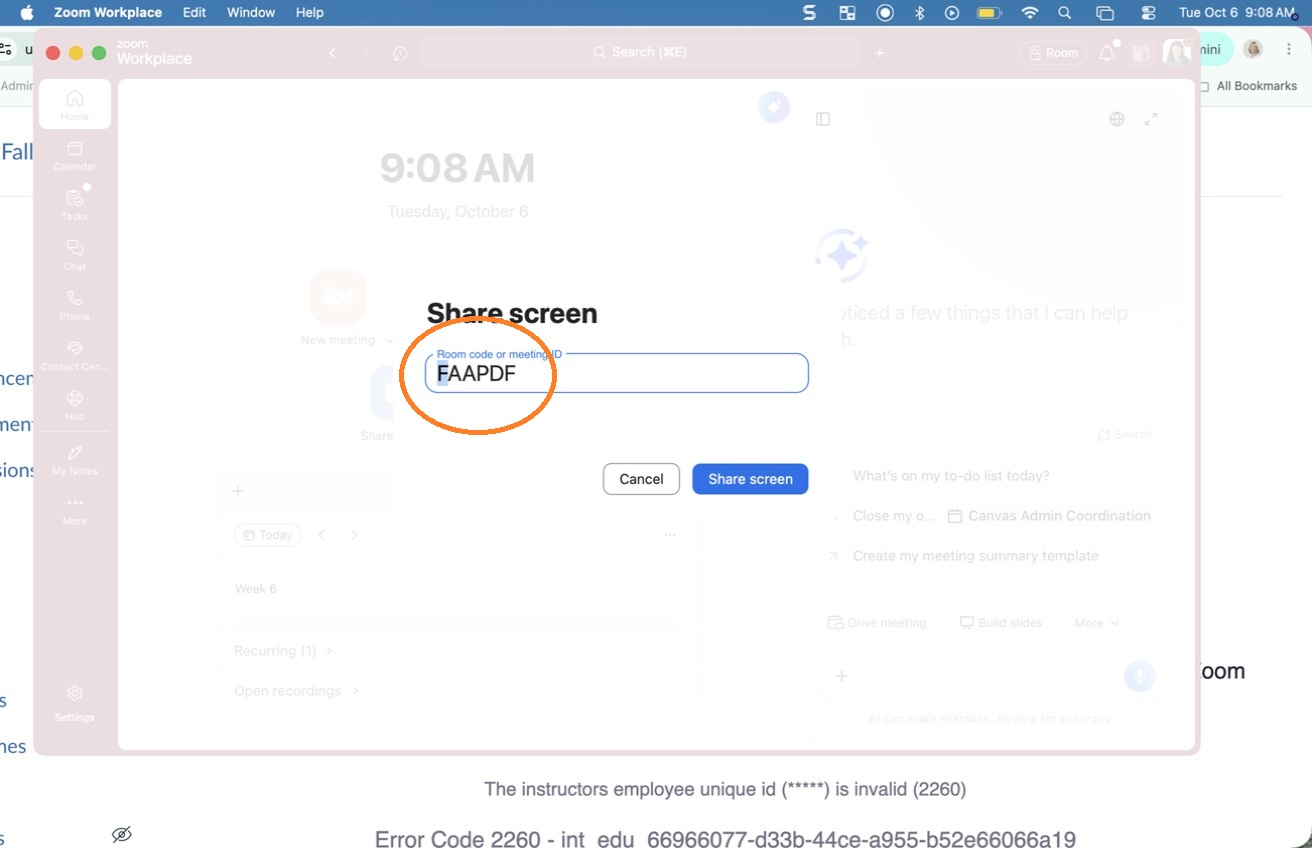
Enter the Room code (shown on the classroom touch panel)
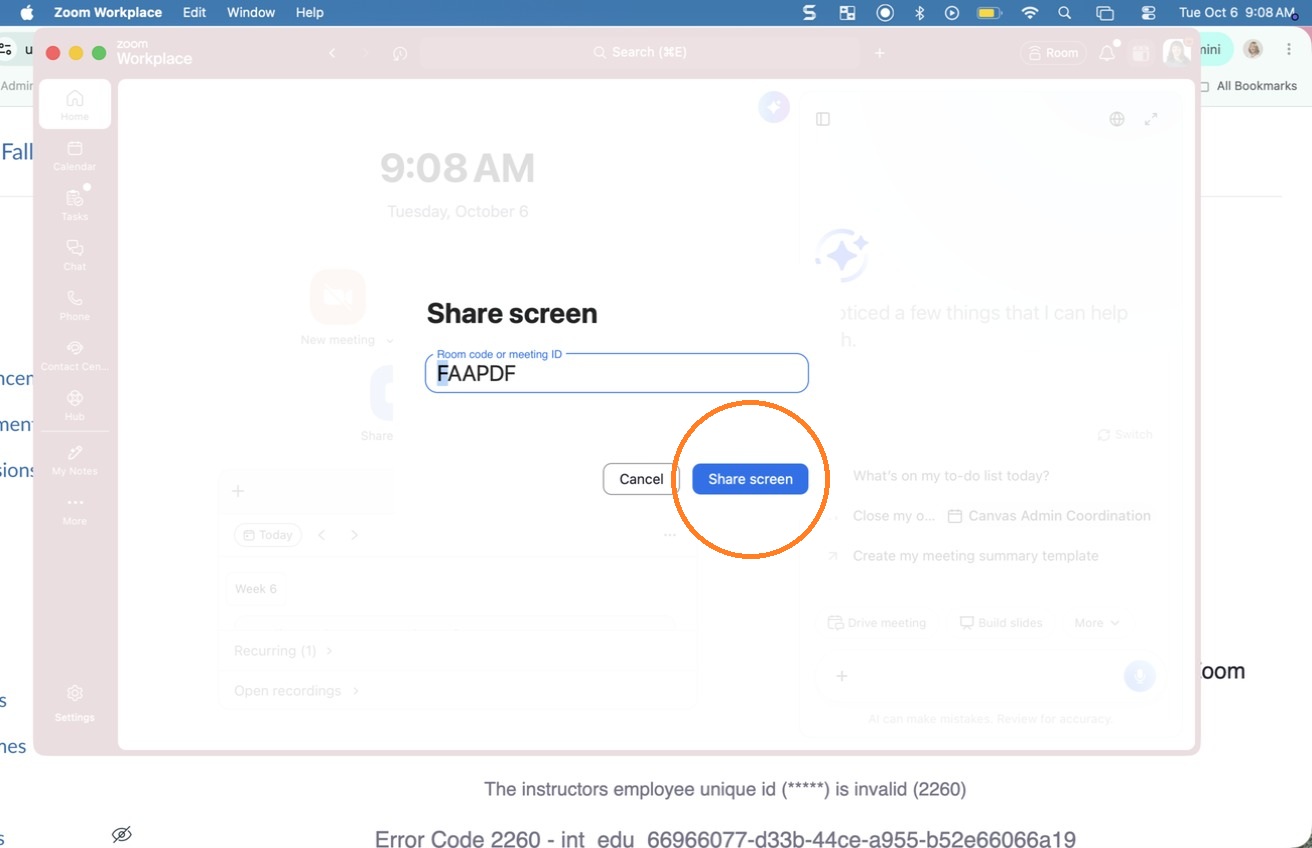
Click Share screen
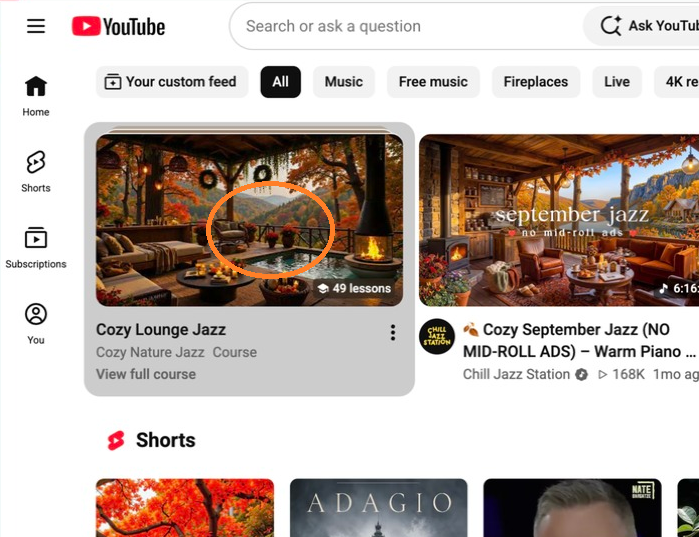
Go to the video you want to share
Adjust the audio on the classroom touch panel
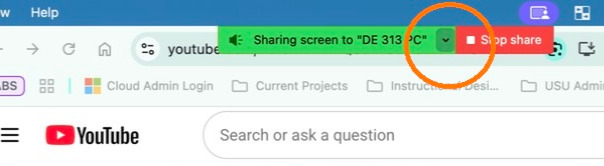
If you don't hear audio, click the down arrow to open Share screen options
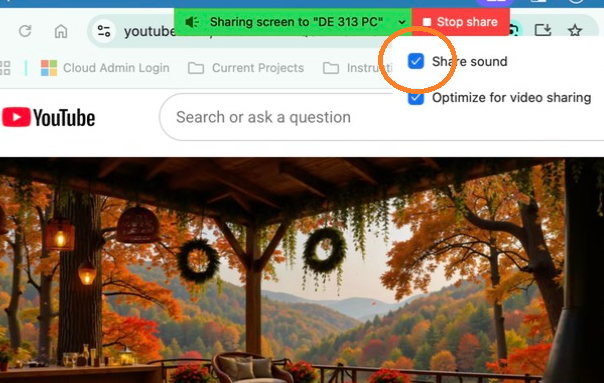
Check Share sound
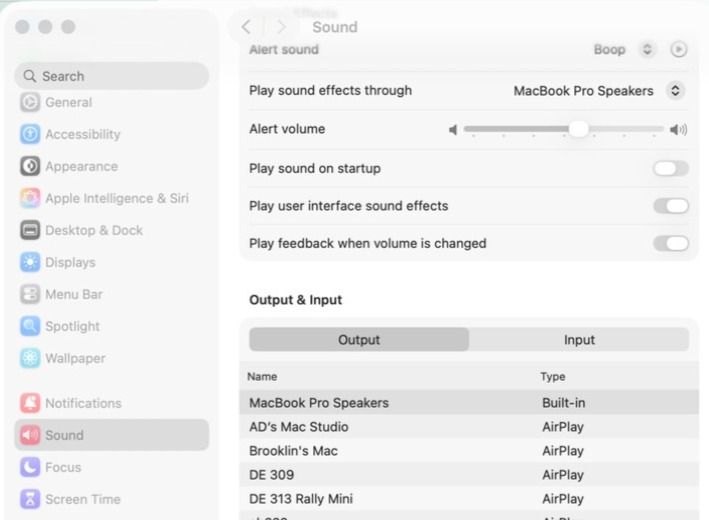
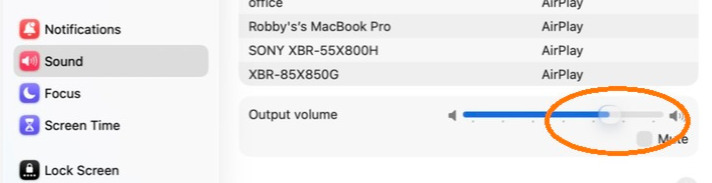
If the audio still isn't playing, open System Settings on the Mac laptop and go to Sound
Click Output tab
Click ZoomAudioDevice
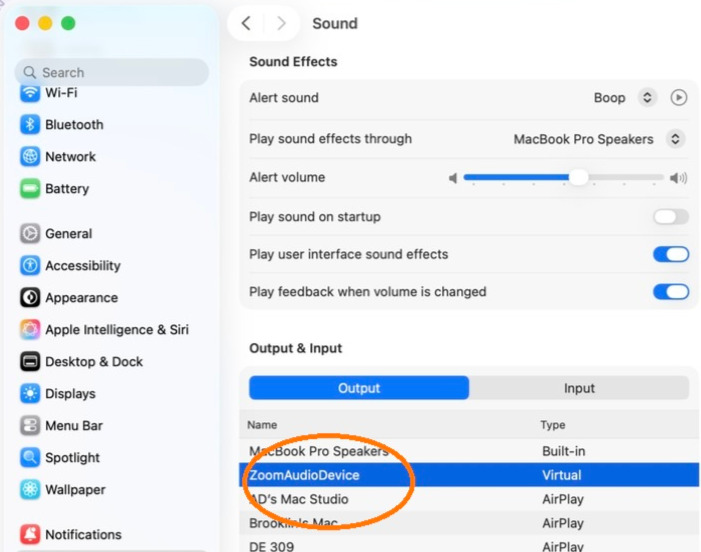
You should now hear the video over the classroom speakers
Adjust the output volume, if necessary
Frequently Asked Questions
Do I need an HDMI adapter for my laptop and where can I find one?
The laptop is not displaying on the projector/TV. What can I do?
- First, ensure the projector or TV is turned on and Laptop is selected on the Crestron Touch Panel.
- Next, check the display settings on the laptop. It should be set to "Duplicate" or "Extent."
- Windows: press the Windows Key + P on the keyboard to change between display settings.
- Macs: Press Command + P on the keyboard to change between display settings.
- If that doesn't help, unplug the laptop connection cable from your laptop, wait a few seconds, then plug it back in.
- If that still doesn't resolve the issue, restart your laptop and try again.
- Still not working? Contact us and we'll look at it with you.