Box Module Component Advanced Settings
The Box Content Map can be customized to better cater to the instructors preferences by organizing the course modules into tabs. Below you will find the instructions on how to create those tabs as well as in-depth explanations which can help you as you troubleshoot your Delphinium interface.
If you need additional help after going through the below instructions, feel free to reach out to CIDI's support team via phone (435-797-9506) or chat (app.purechat.com).
Organize with Tabs
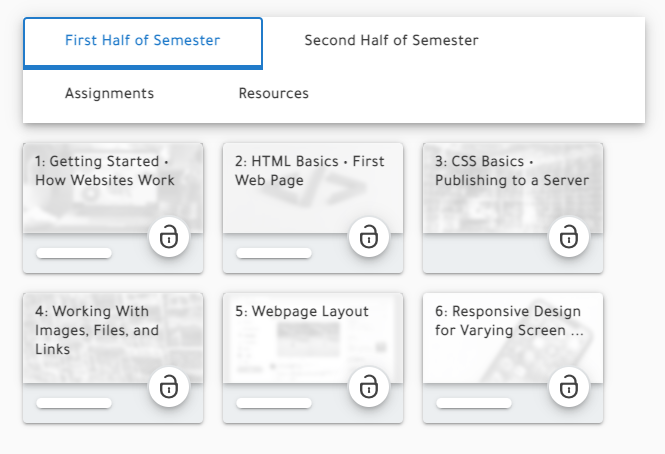
To group and organize your course modules into tabs like the image below, follow the instructions that follow.
Go to Settings

Navigate to the Module Meta-data Tab

On this tab you will see a list of your modules

Click + Module to create one of the tabs that you will group your modules under
Note: When you create a new module in Delphinium, it will create a new module in Canvas. You will be able to find this new module under the Modules tab in the Canvas course navigation.

Type in the title of the tab and click Add Module
Repeat this step until you have all of your tabs
Note: There is a possibility that your new module won't appear after you click Add Module. To make it appear, click the Update Page button directly to the left of the + Module button. Doing so will result in the page refreshing, where you will have to navigate back to the Module Meta-data tab by repeating steps 1 and 2.
When you create a new module, it will automatically nest under your first module. Proceed to step 5 to see how to rearrange it the way you would like.
Organize modules
To nest your modules underneath the desired tab, drag the module underneath the tab and slightly to the right. Below you will see an example of both incorrect and correct placements as you drag the module.

Wrong: As you are dragging the module underneath the tab, if the dotted line to the left of the list is cut off, this will not nest your module under the tab.

Right: As you are dragging the module underneath the tab, if the dotted line to the left of the list is connected to the next tab title, your module will be placed correctly.
As you continue to add more modules to your tabs, you need to make sure that you don't nest any of your modules any further. Below are some examples on how to correctly do that.

Wrong: If you don't see a connecting line between your other nested modules and the module you are currently dragging is slightly more indented than the others, you have placed it wrong.
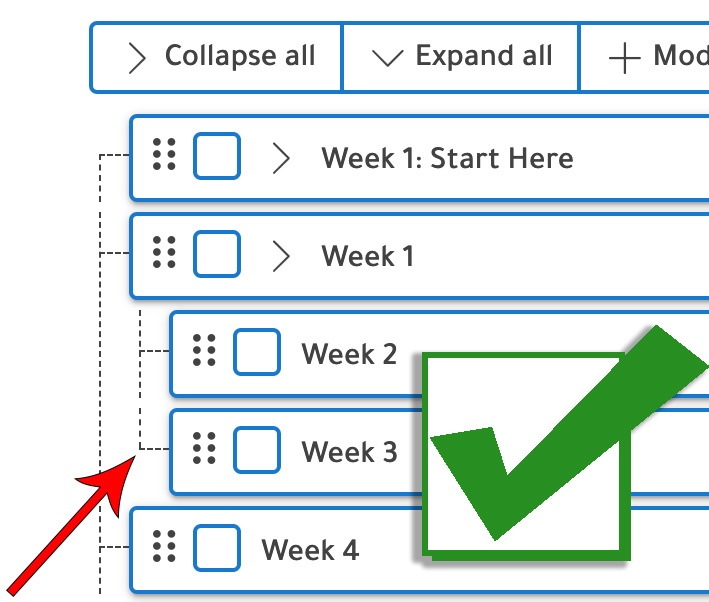
Right: If there is a connecting line that appears between the other nested modules and it has the same indentation as the others, then you have place it correctly.
One final note: Delphinium will only display the module content of the first-level of nested modules. Meaning that a module that contains assignments and pages will only display those assignments and pages if it is nested under a tab. See the following example:
- Tab Name (Only Title; No Contents)
- First-Level Nested Module (Displays Module & Contents)
- Second-Level Nested Module (No Display)
Click Update Page
