Record a Presentation on Your Computer
You can use the Kaltura Capture tool to record a presentation on your computer (computer requirements) and make it available in your Canvas course.
Recording Suggestions
We recommend that you keep your recordings from 10-15 minutes in length. This will improve your upload time and will make it easier for students to find specific content for reference. You can put those videos together in a playlist for students to view.
Additionally, to help your recordings run smoothly, review the Kaltura Capture keystrokes.
Microphone Recommendations for At-Home Recording
If you are going to be recording lectures from home (or your office), you might want to consider investing in an external microphone to improve the sound quality.
You may already have one around your house in the form of a gaming headset or cell phone headphones with a microphone. If not, here are some suggestions from our Media Productions team. (The links below go to Amazon, but it may be faster to locate similar products through other retailers.)
When using an external microphone, you'll need to remember to select it as the microphone to be used during recording. USB microphones don't automatically adjust the volume, so you will want to test with it to make sure the volume is properly adjusted before beginning your recording. You can muffle excess noises using cloth i.e. blankets, extra clothes, etc.
How to Record on Your Computer
To record a presentation from your computer, follow these steps:
Open My Media
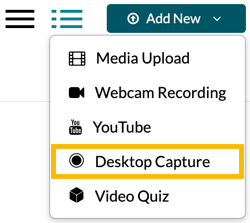
Click the Add New dropdown, then select Desktop Capture
The first time you select this option you will be prompted to download and install the KalturaCapture Desktop Recorder. Download the version appropriate for your computer (Windows or Mac) and go through the installation process.
After you install the application, repeat steps 1 and 2.
If you are recording on a Mac with Catalina OS 10.15 see Screen Recording on Mac OS 10.15 for an additional setting adjustment.
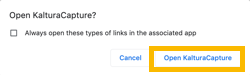
Click Open Kaltura Capture
You can check the "Always open these type of links in the associated app" box to avoid this dialog in the future.
Select the sources (your webcam, mic, and screen) you want to record
A blue icon indicates that device will be recorded.
A gray icon with a line through it means that device will not be recorded.
Clicking on the arrow next to the device will provide options for that device.
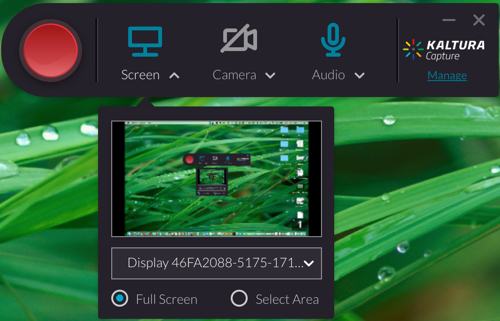
Click on the red dot to begin recording
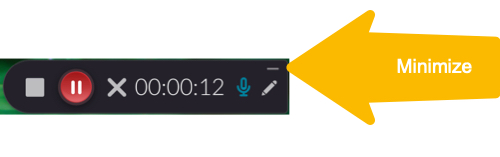
You will see a clock in the bottom of the screen showing how much time has passed while recording. You can minimize the clock by clicking the line in the top, right of the window.
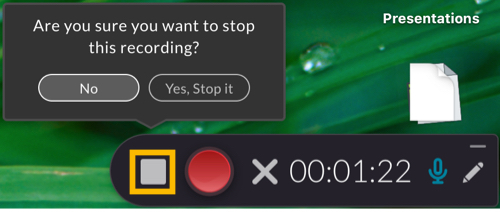
Re-open KalturaCapture from the dock, click on the square to stop the recording, then click Yes, Stop it
Preview the recording and enter a title, description, and tags

Click Save & Upload
If you click on Save, the video will save to your computer.
Once the video has been completely uploaded, it will appear on your My Media page in Canvas. Now you can embed your video into a Canvas page or publish the media to the course Media Gallery.
Additional Resources
The following video is an overview on how to use KalturaCapture desktop application.