Use Question Datasets in Atomic Assessments
CSV (comma-separated values) data sets can be used in most question types. Datasets are useful in assessments with math and plain text when you would like questions to pull from a bank of options. Currently, data sets will not accommodate special characters.
How to Access the Data Table
Accessing the Data Table can be a little confusing and is a necessary step in being able to follow along with each of the following sections that follow.
To access the Data Table you:
Navigate to the assignment in Atomic Assessments
If you do not already have an assignment in Atomic Assessments, create one.
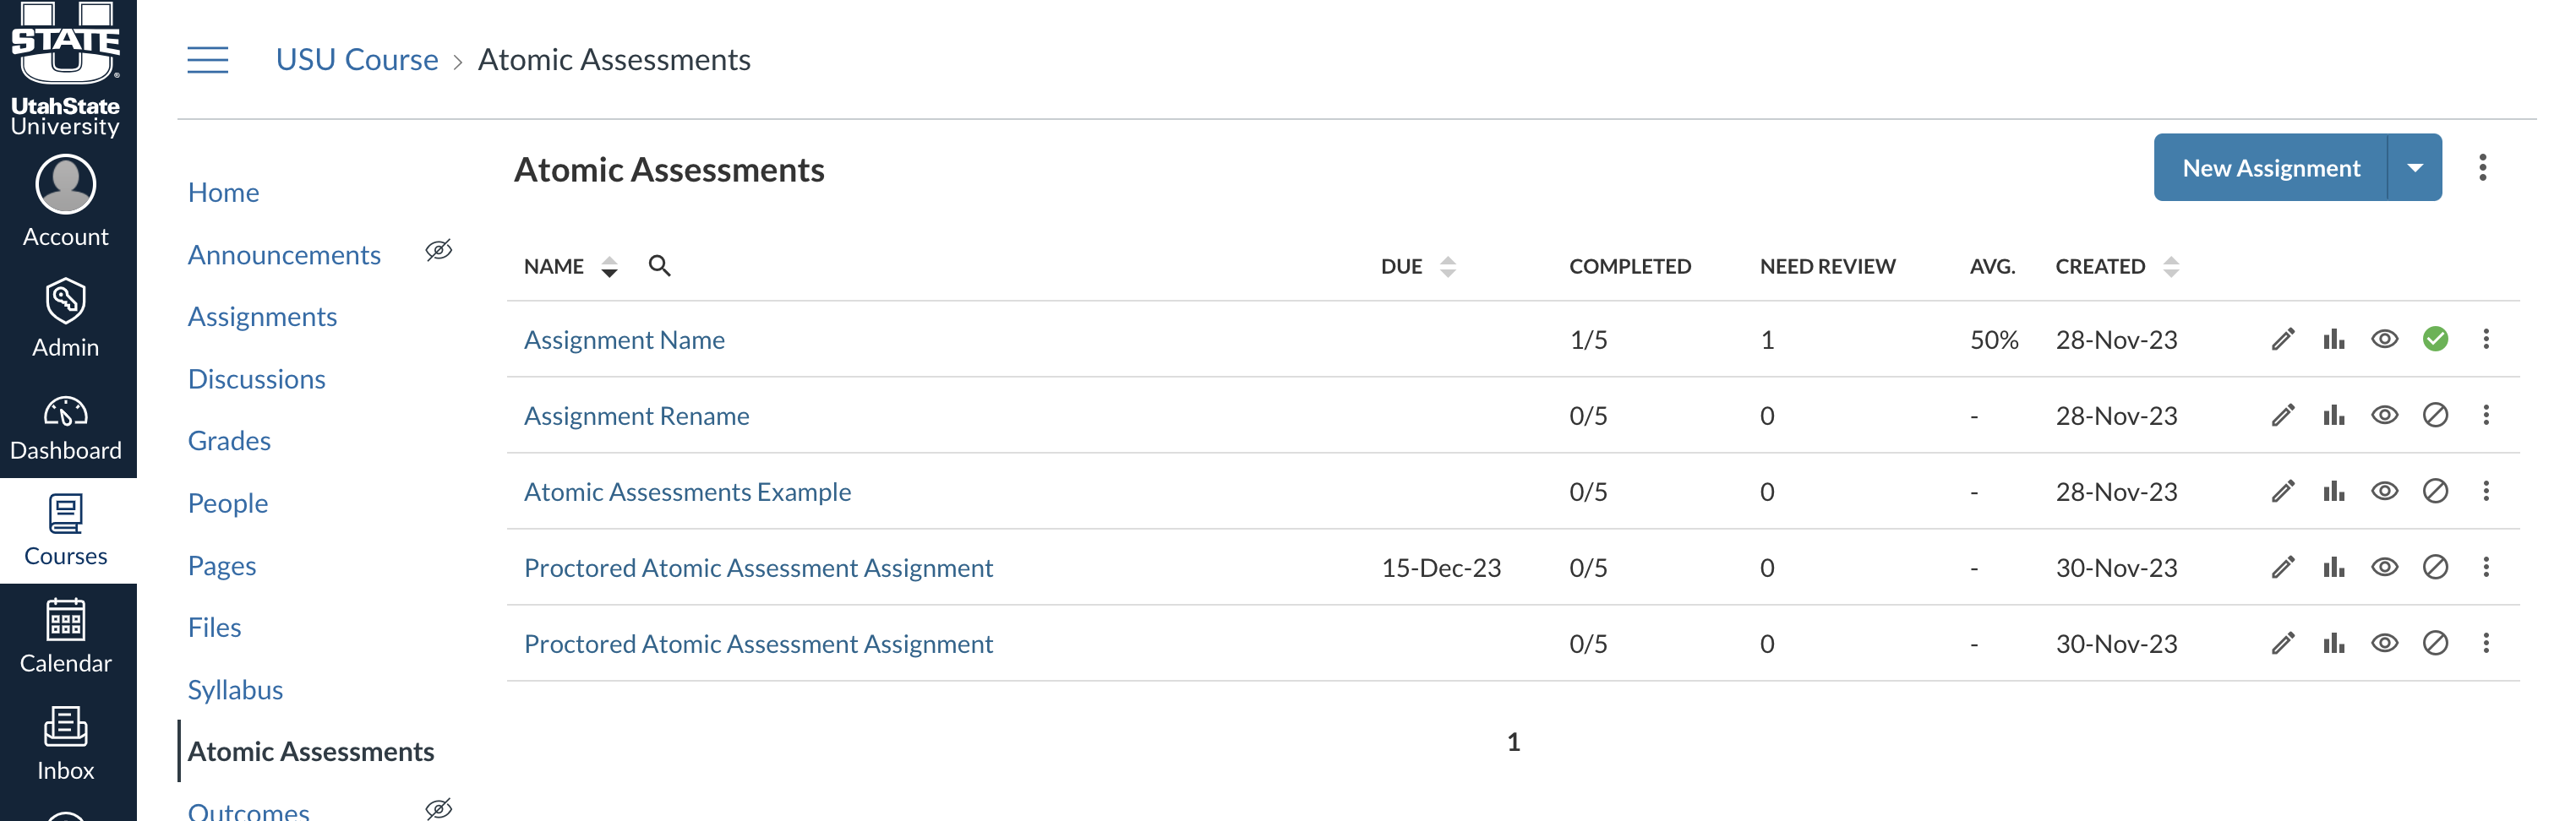
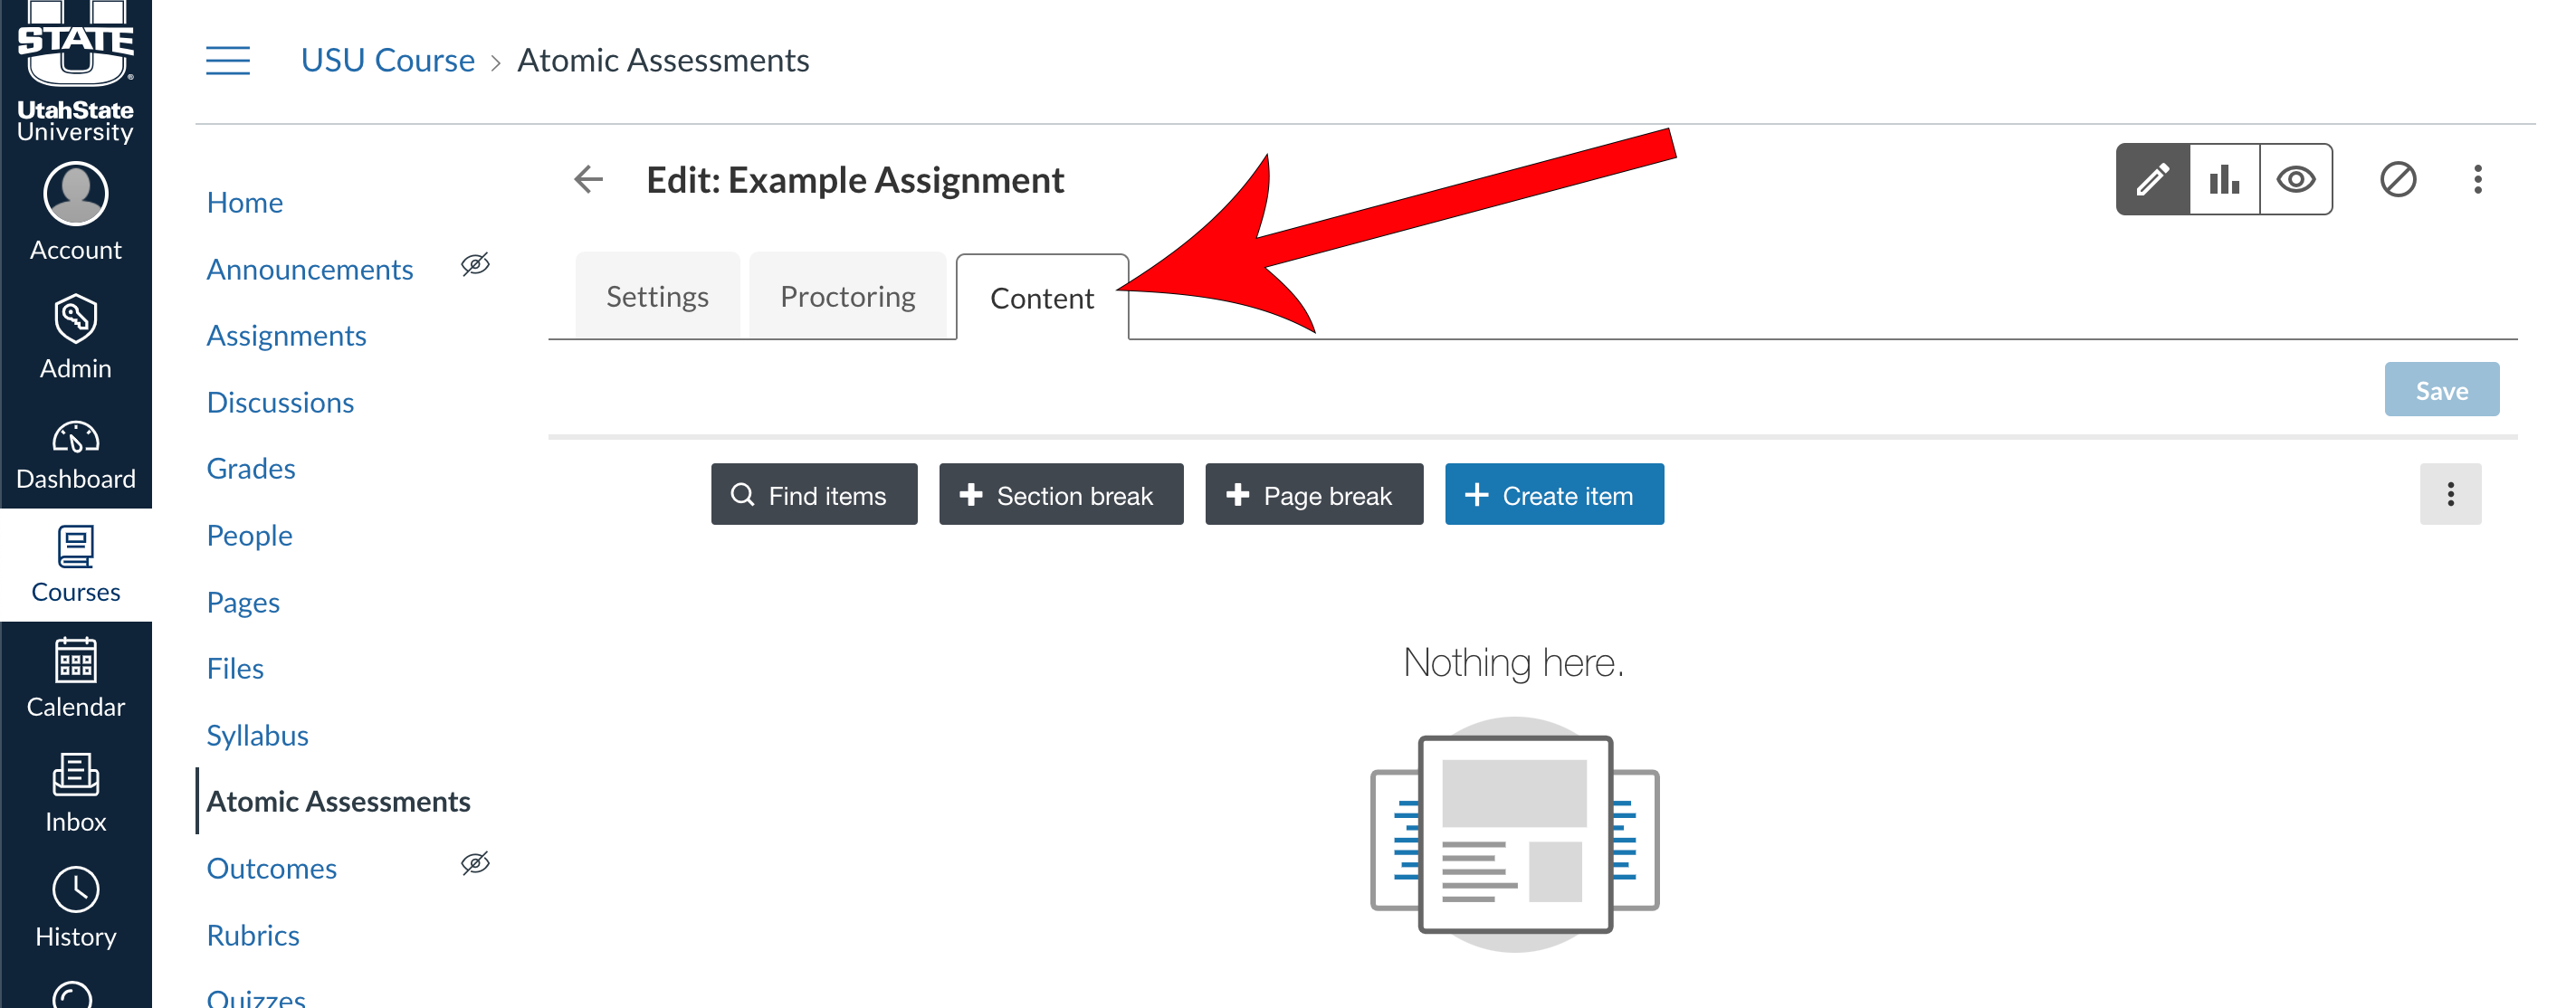
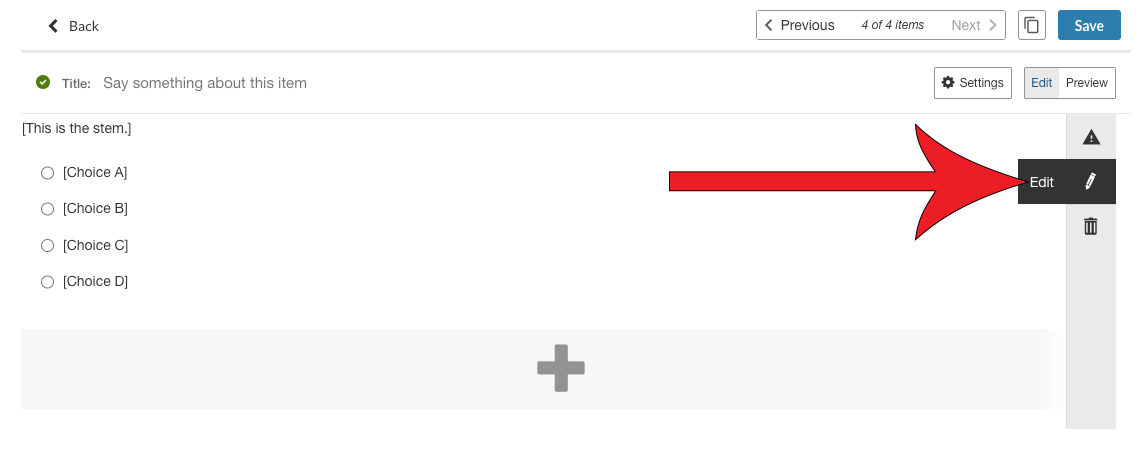
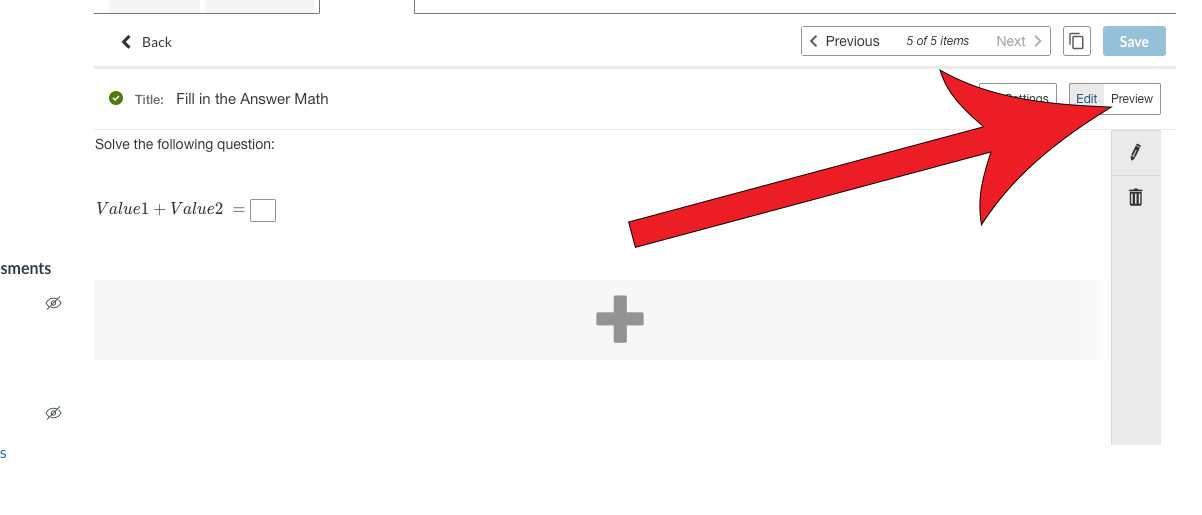
Navigate to the Edit tab
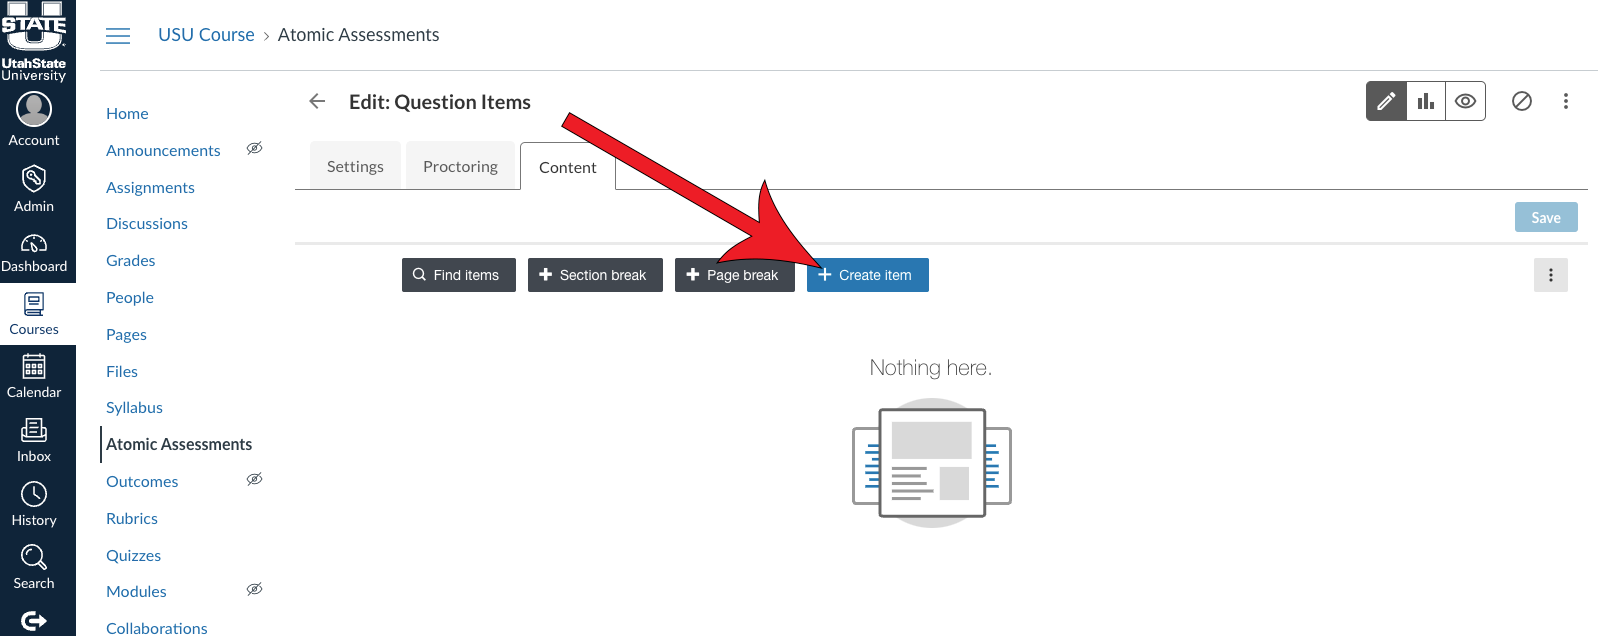
Click on the Content tab
Click + Create item
Select a question type
For this example, we are going to proceed with selecting a Multiple choice - standard question.
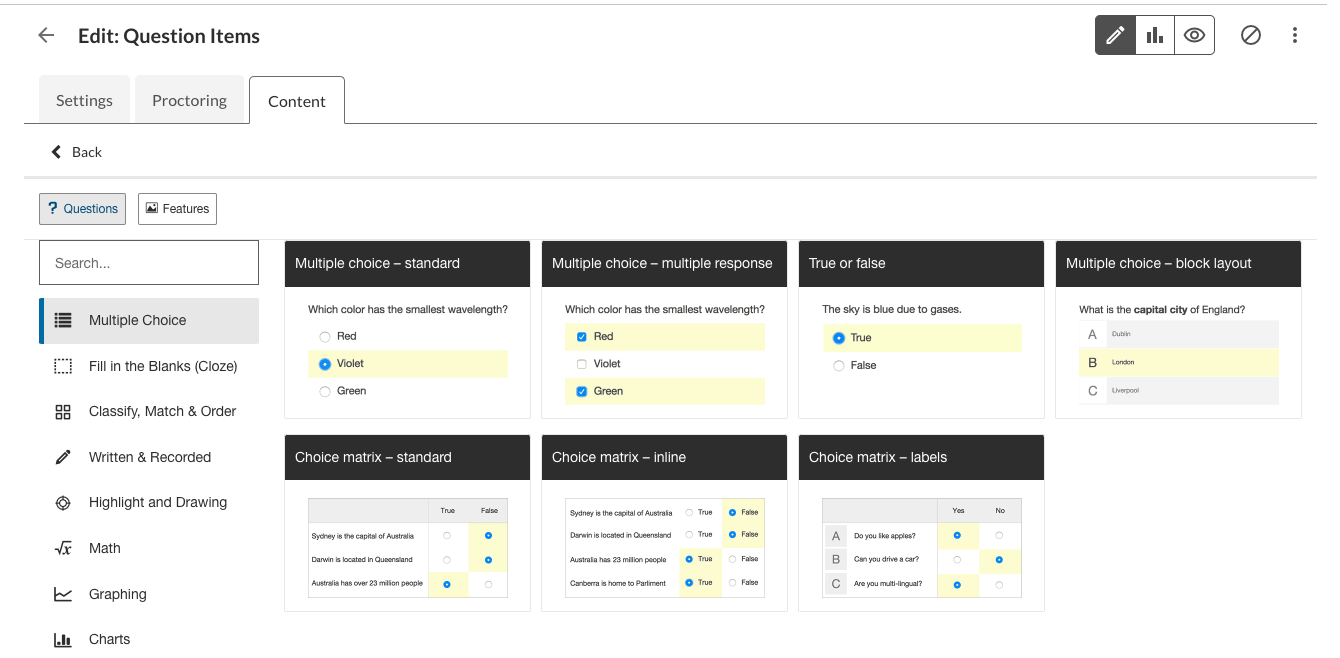
Click Save before filling out the question information

Click Settings

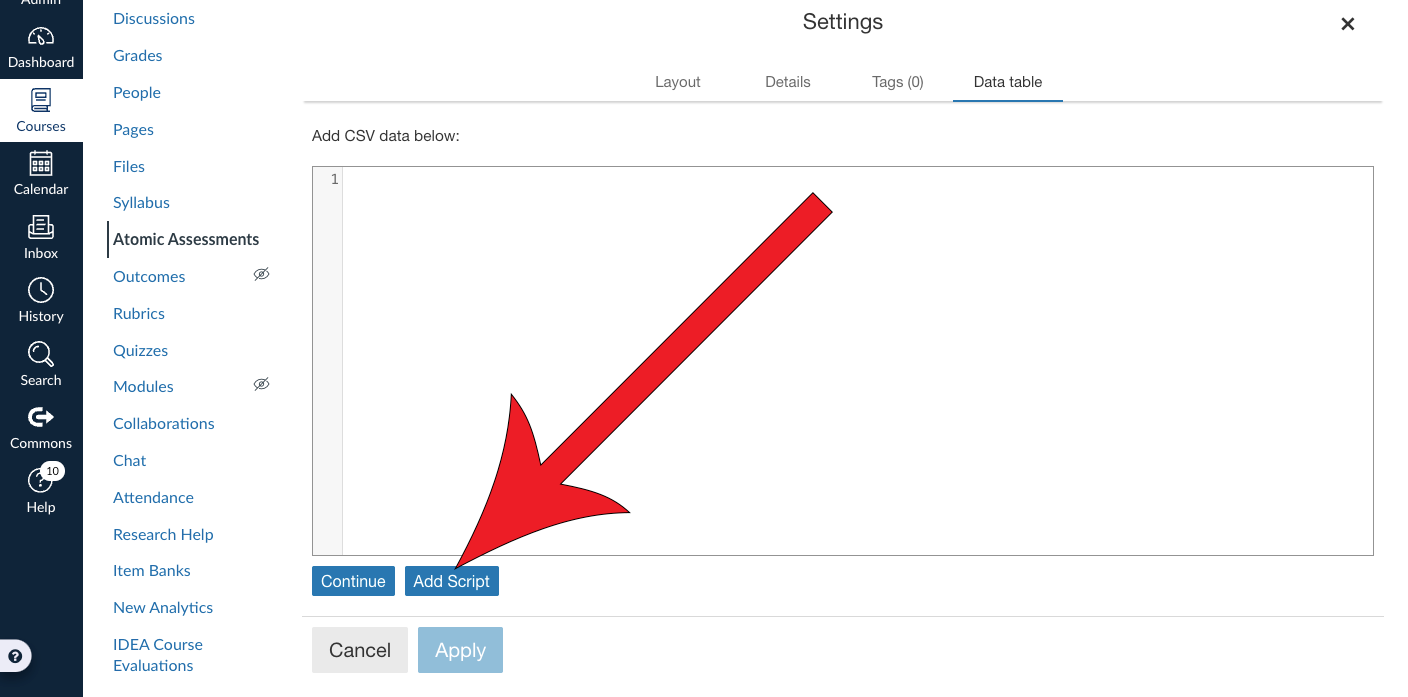
Navigate to the Data table tab

Plain Text Problems
You can use the Data Table feature if you want a random subset of data to be selected for a question that is plain text and doesn't involve math. For the following example, we will show you how to do this with a set of data if you were testing students on the state capitals. If you haven't already, follow the instructions in the section above to get to the Data Table, which is where you will start.
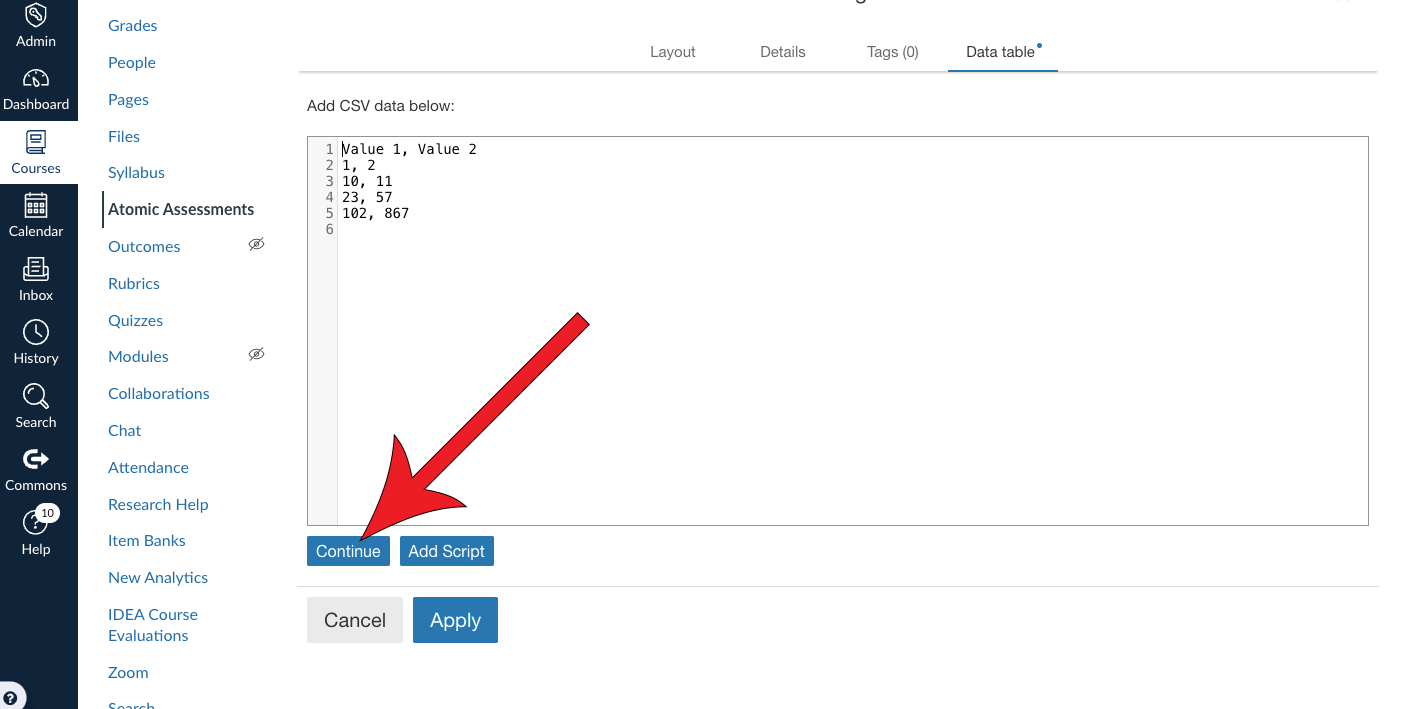
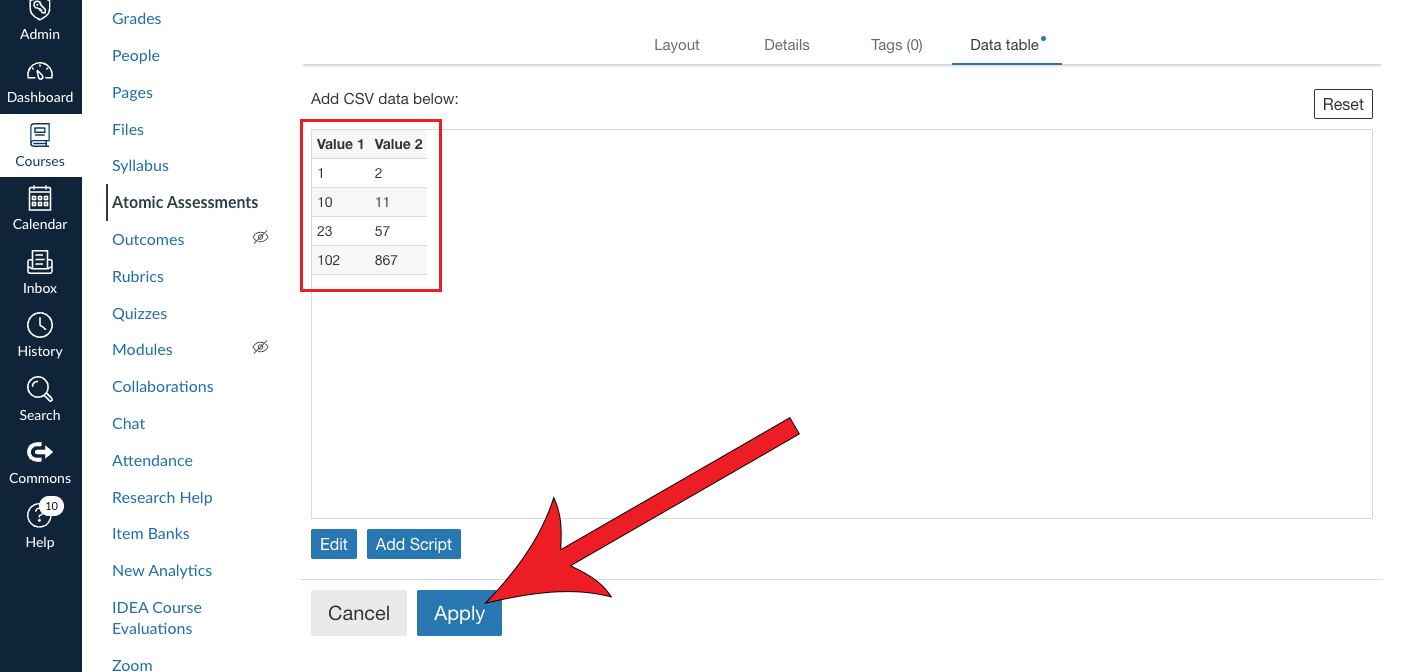
Enter your data
For your first row, enter in your column names. This will be how you know which variable to select from.
- We recommend that in addition to the variables that you use for your question and answer, that you include columns for the remaining incorrect answers.
- In our example, we included a State variable to be used within our question, a Correct City variable to be used for the correct answer, and three Incorrect variables.
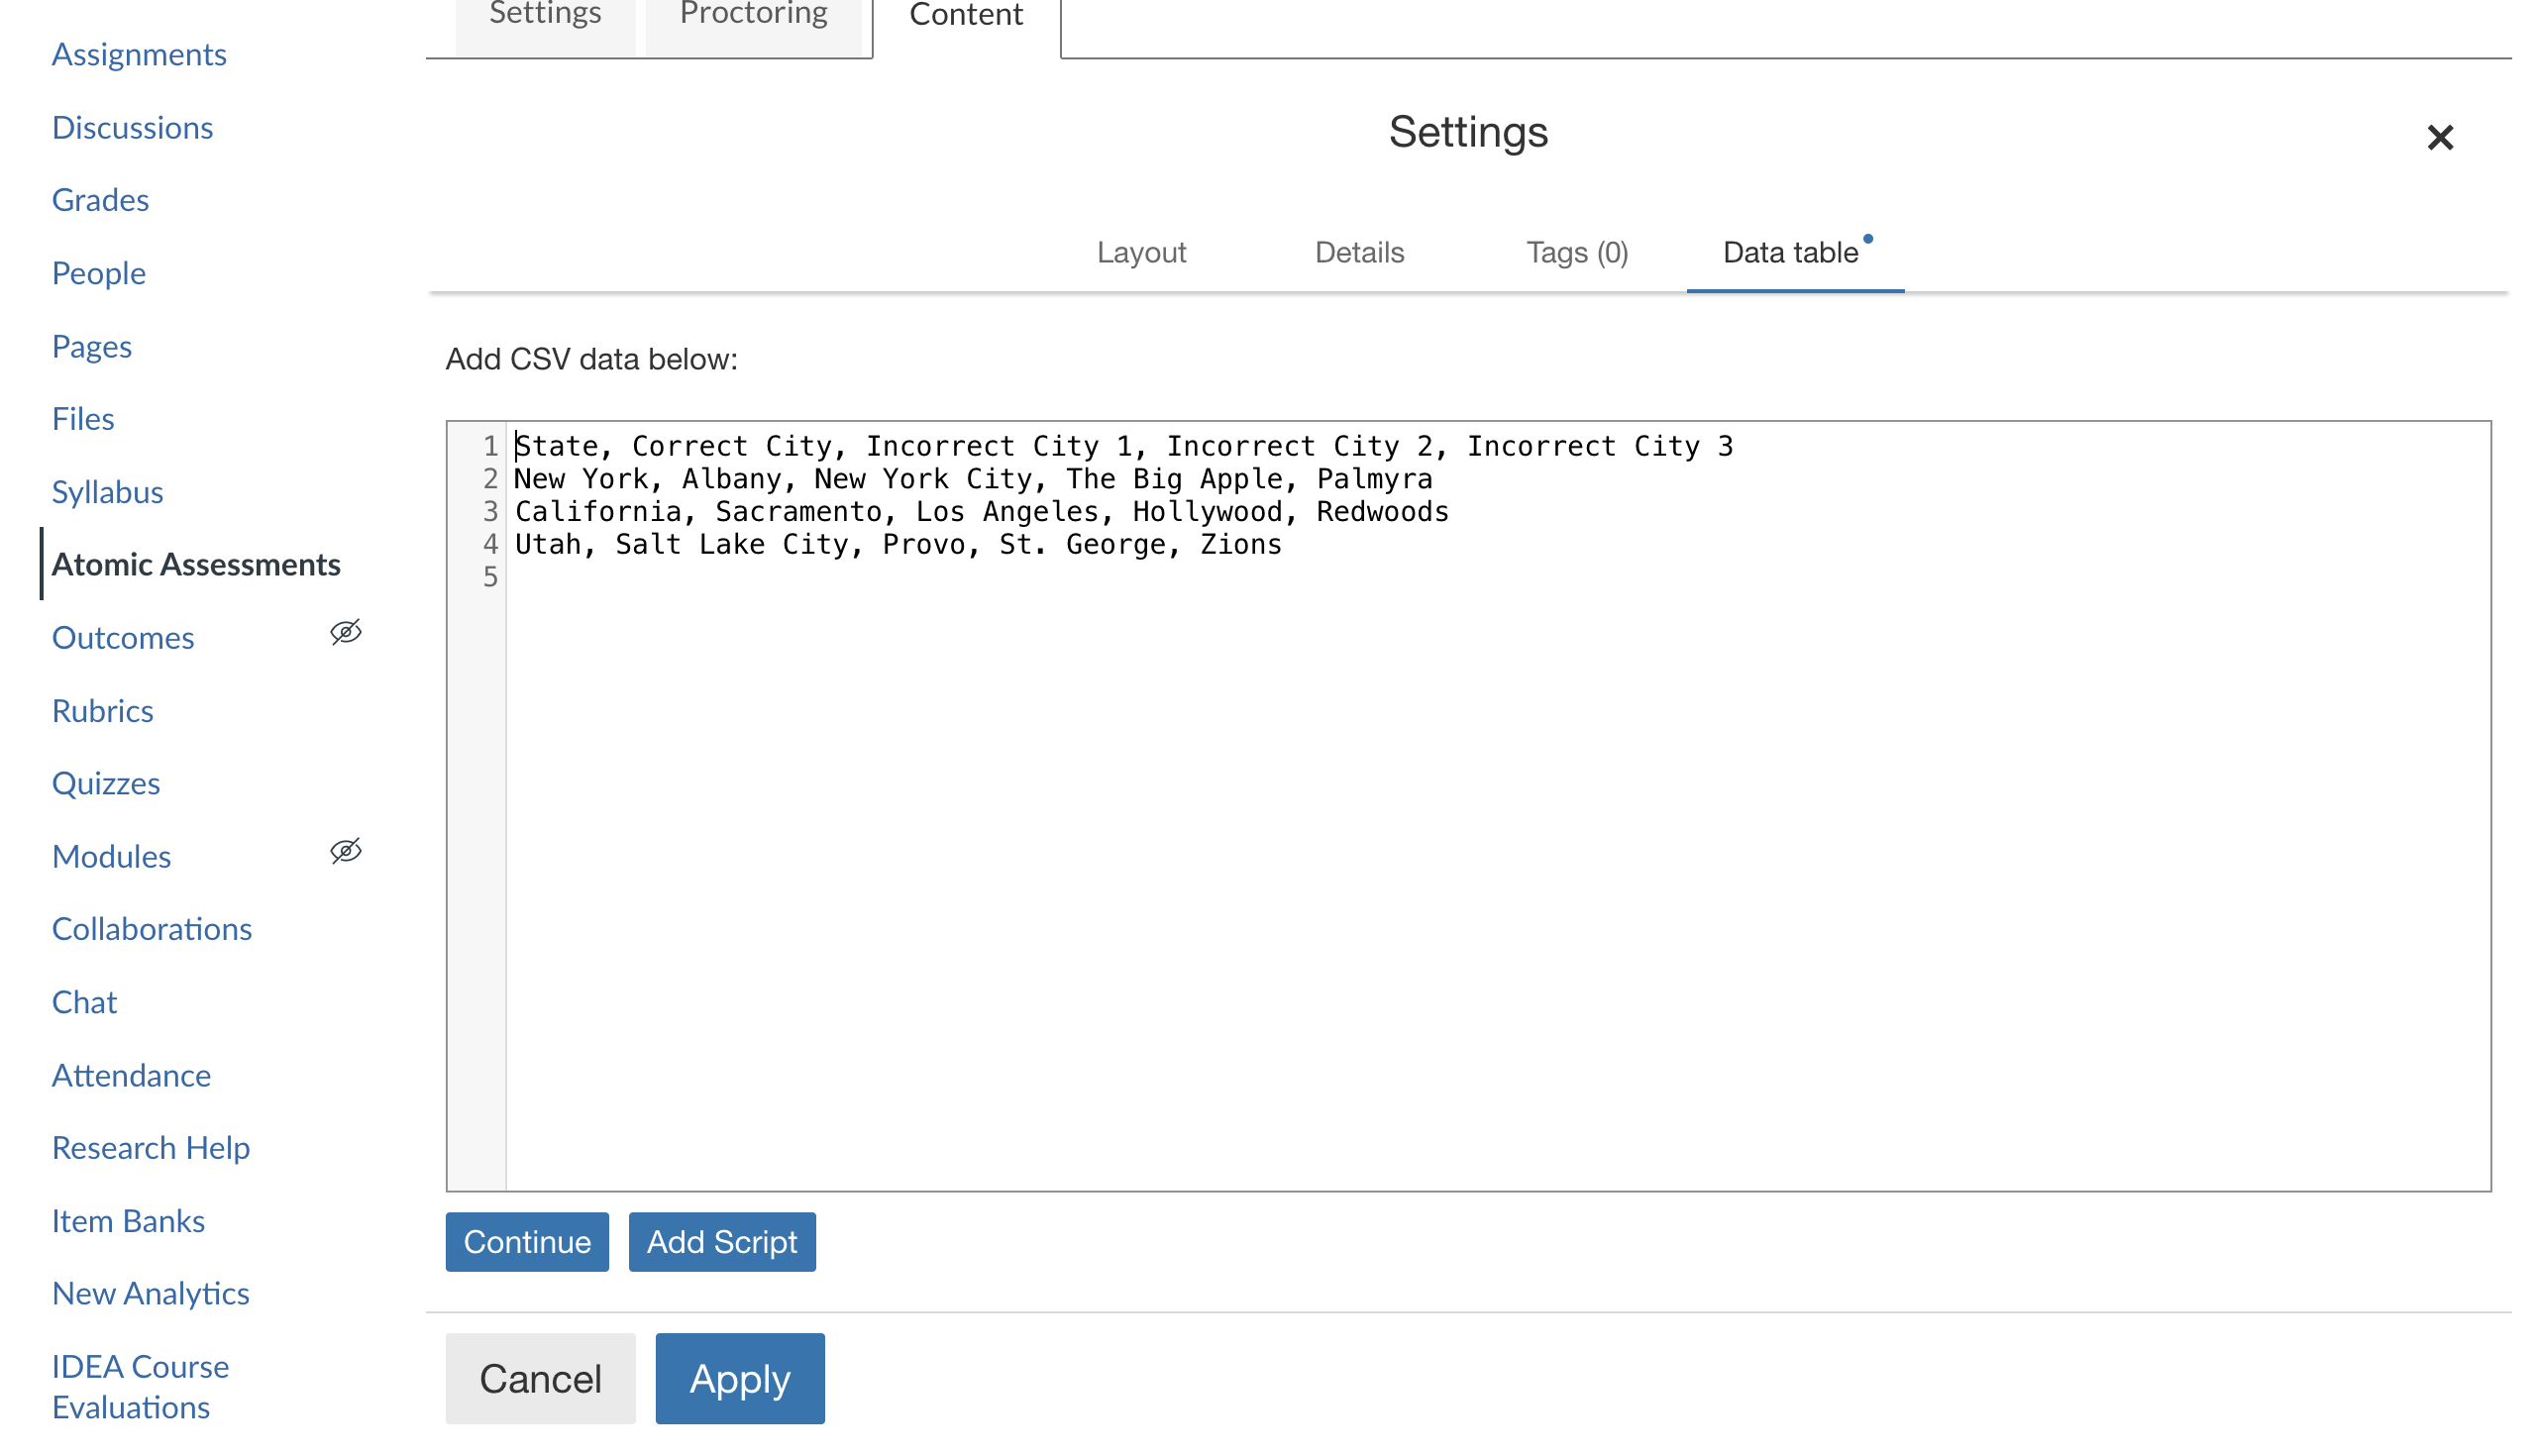
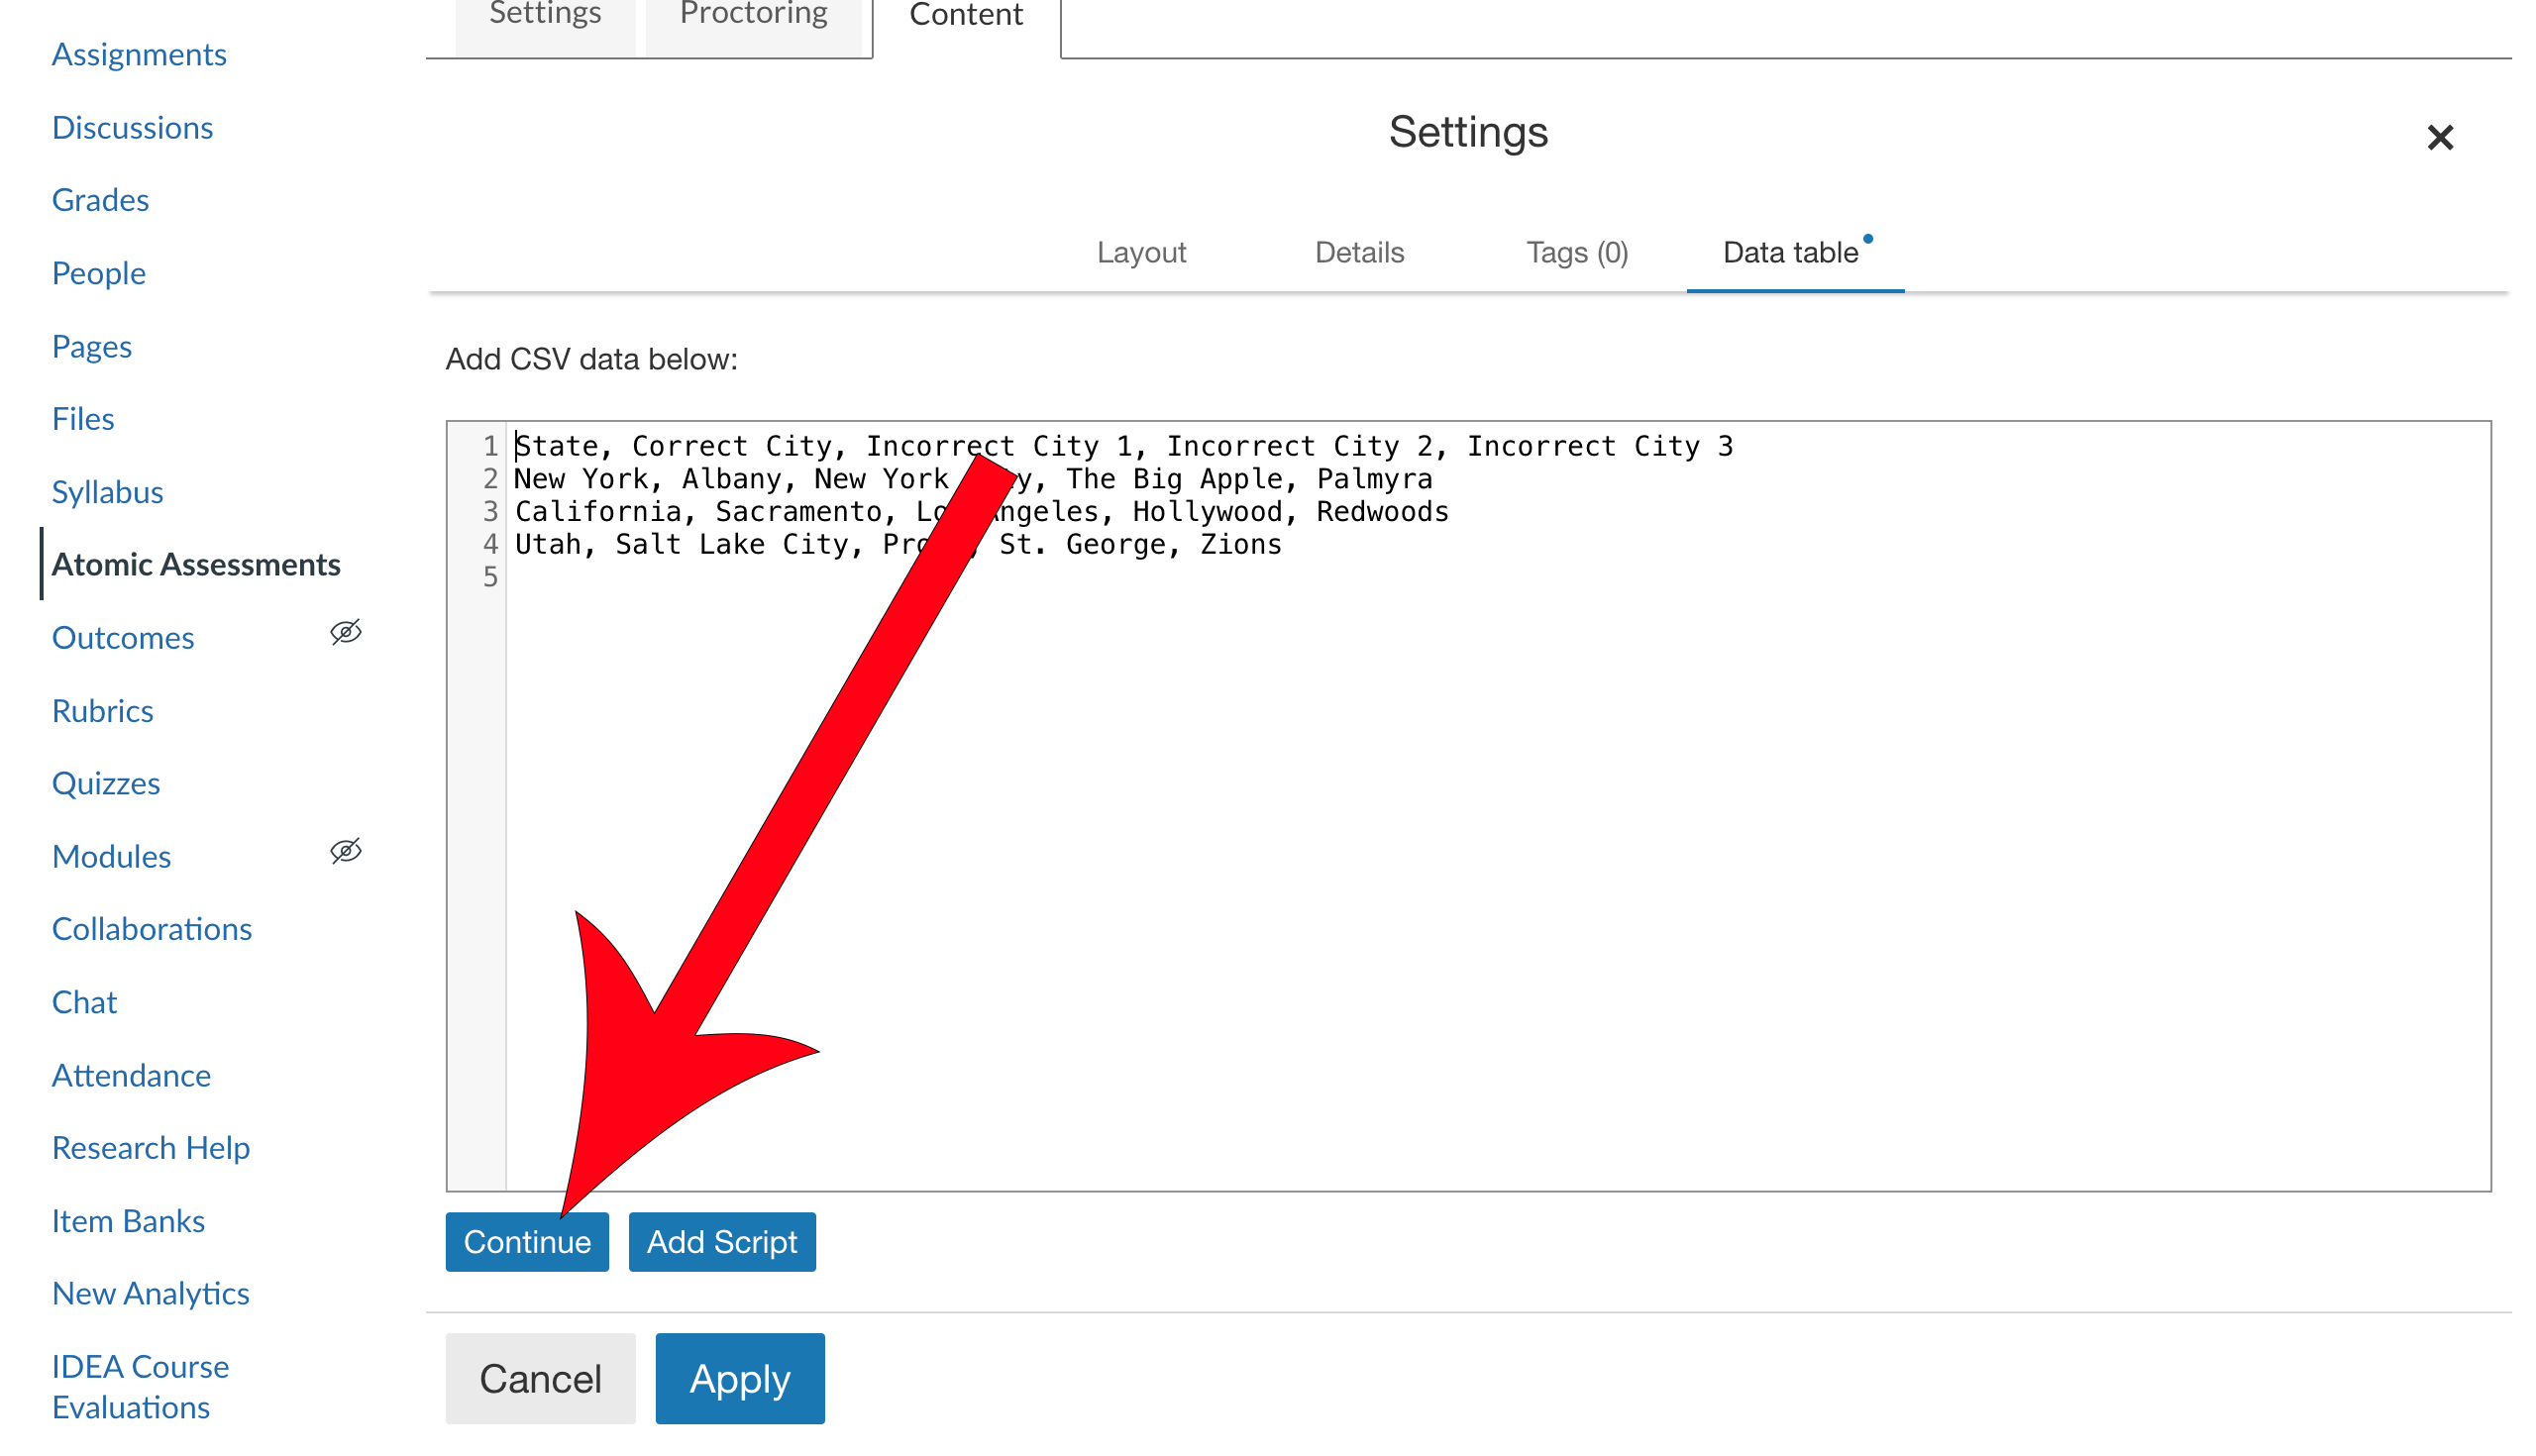
Click Continue
Review the table and click Apply
When pulling your data, Atomic Assessments will pull all of the information from a single row.
Let's say that Atomic Assessments randomly grabs the second row of values. That would mean that when you include the State variable, it will display "California". When you include the Incorrect City 2 variable it will display "Hollywood" for the student for all of the questions with those variables in the item.
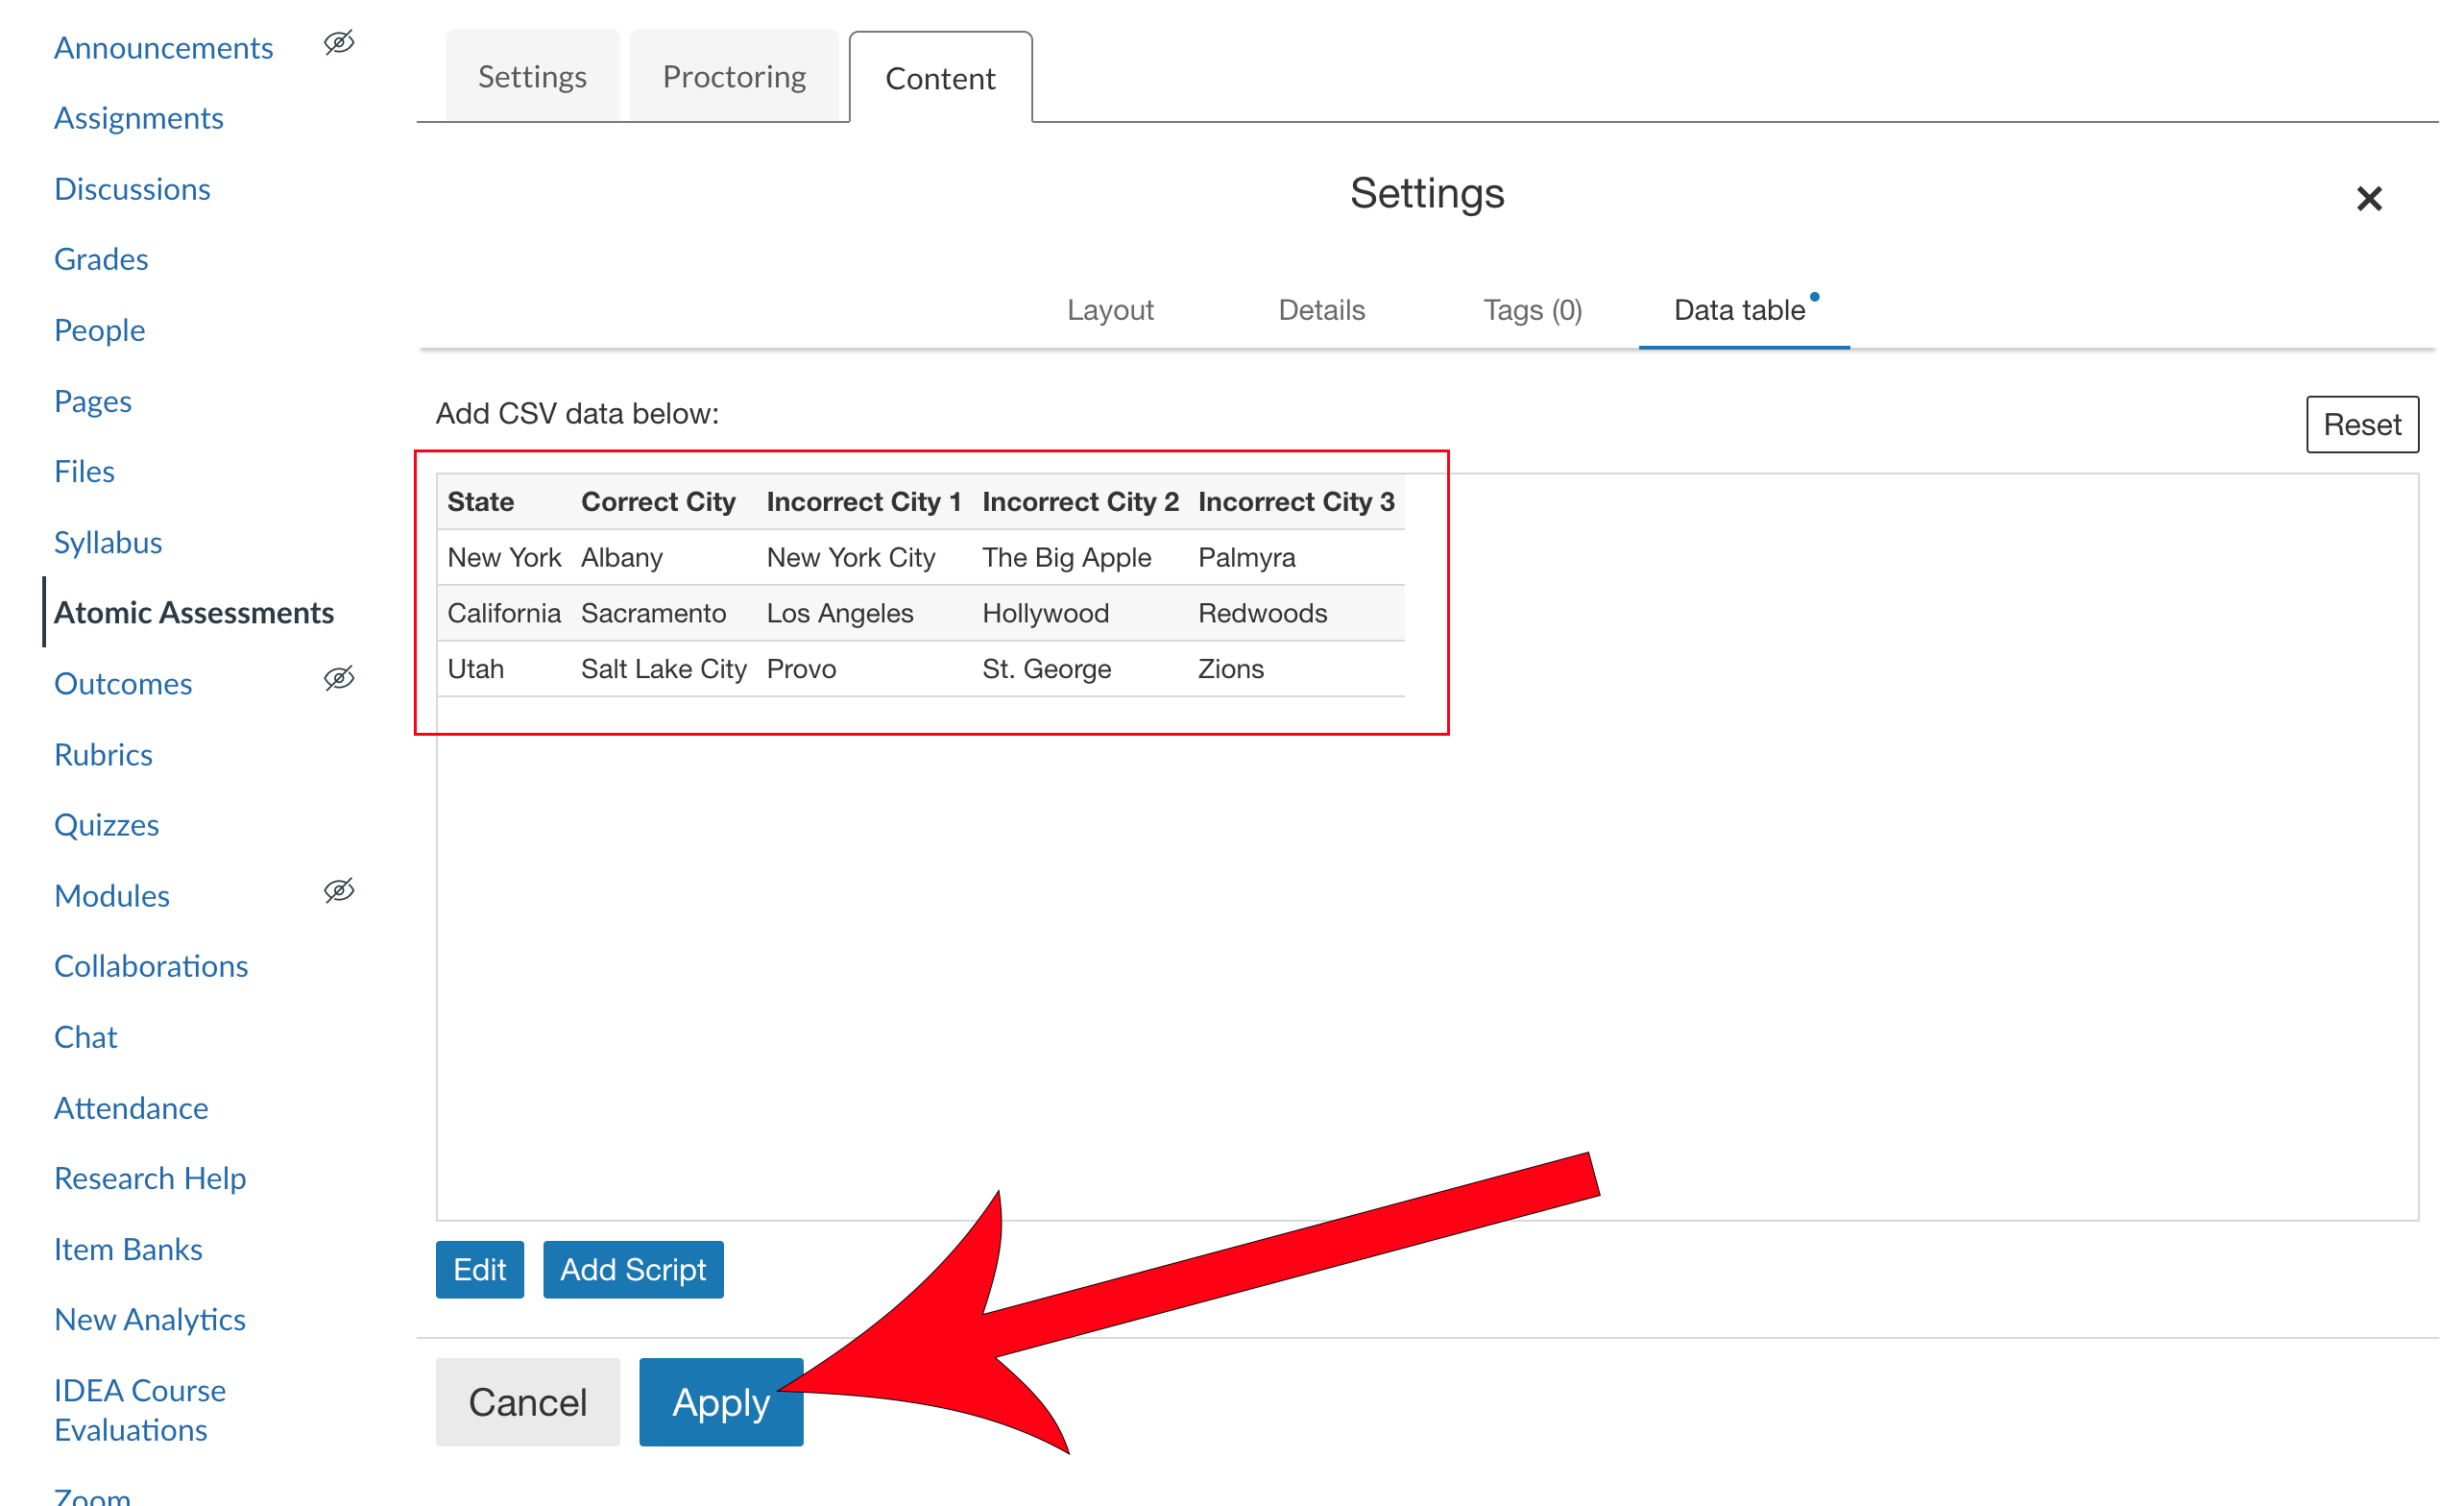
Click Edit
Write your question with your variable
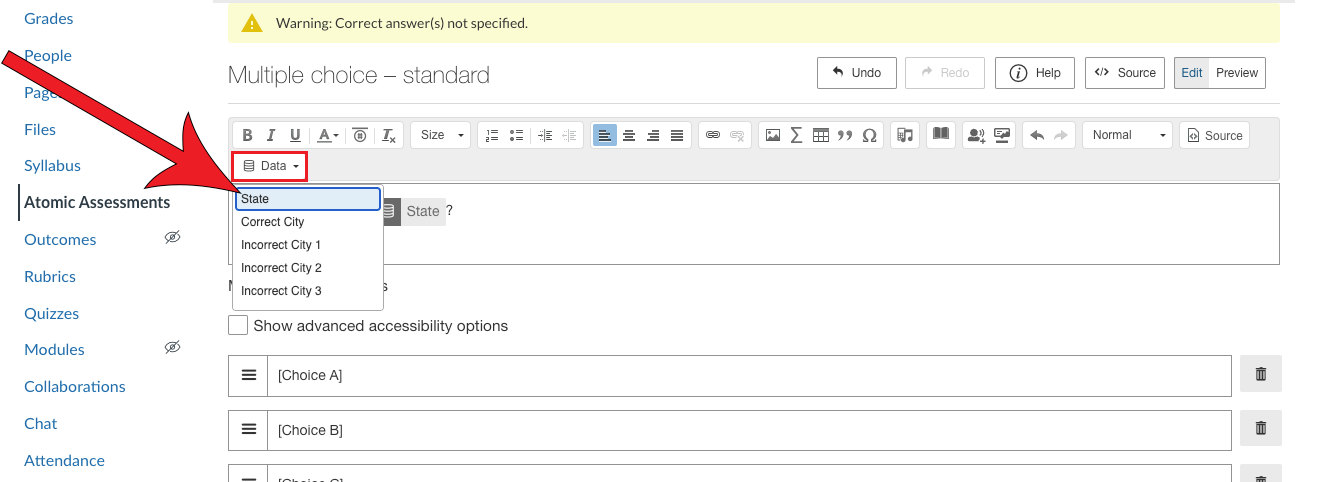
You can access your data variables through the Data dropdown. The column headers from row 1 of your data table will be available in the dropdown menu to select as a placeholder variable. Each student will get a random row from the data in the table.
In the example below, we will use the State variable in our Data Table.
Fill out the answer options
You do this in the same manner that you added your variable in your question.
It is not required that you have variables for every one of your questions, but if you do decide to type in distractors, we encourage you to review each of the rows in your data table to make sure that you don't duplicate any of the variables.

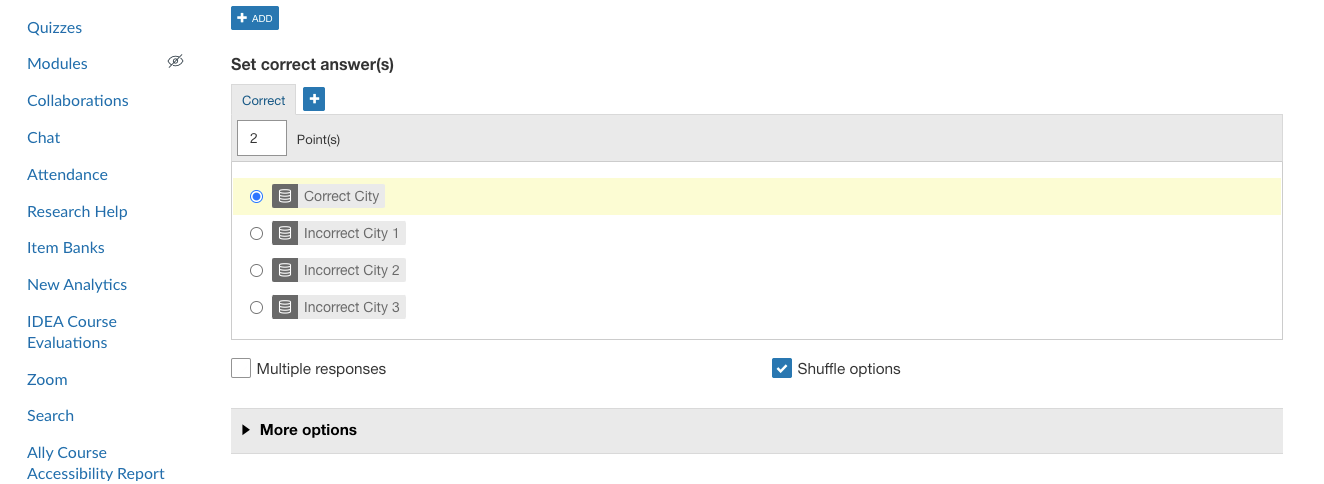
Set the correct answer and enable any other desired settings
You can see additional settings by expanding the More options dropdown.
Scroll to the top and click Save

Review the question by clicking on the Preview tab
The Preview will display what the question will look like with the actual value of the variables.

Math Problems
The most common type of problems that Data Tables are used for are for Math problems. The Data Tables feature makes it easy to be able to randomize the variables and solutions the same that a question bank would, but within the problem itself.
Multiple Choice
To create multiple choice math questions, follow the instructions found in the Plain Text section of this page. Similar to the example used in that section, we recommend that you create several columns that contain the values of your distractors. You may notice that in the Fill in the Answer section below, you can include variables within the formula for the answer, but that functionality does not work the same in the Multiple Choice question type.
Fill in the Answer
These steps are for Math problems where the students have to enter in the solution as their answer as opposed to a multiple choice. You may notice in the steps below that it is not necessary for you to create a column that contains the answer, it will be able to calculate it for you.
Follow the steps in the How to Access the Data Table section and select the Math question type

Enter your data
For your first row, enter in your column names. This will be how you know which variable to select from.
It is not necessary for you to include a column that contains the answer. Atomic Assessments can calculate the answer for you.

Click Continue
Review the table and click Apply
Click Edit
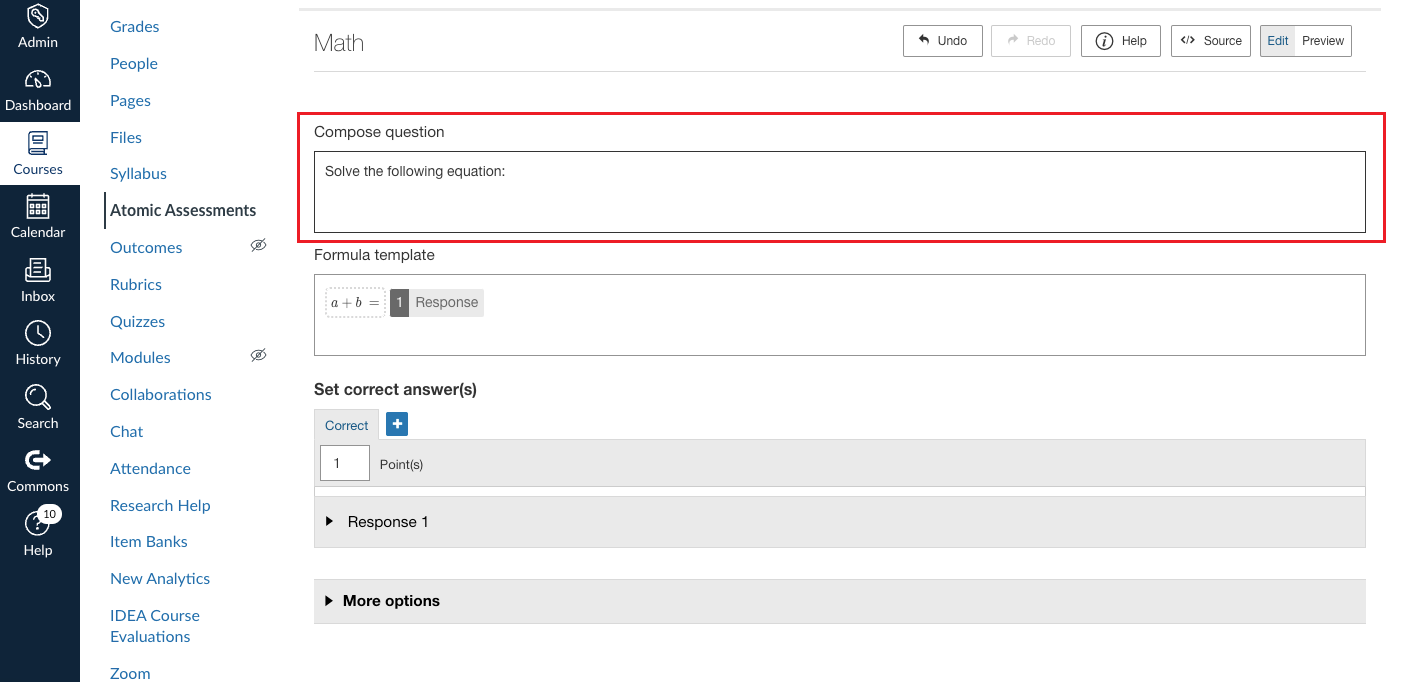
(Optional) Compose your question
This field is where you would write out a question for context, not where you will put in your formula. See the image below for an example.
Create your formula with the variables you created in the Data Table
To do so:
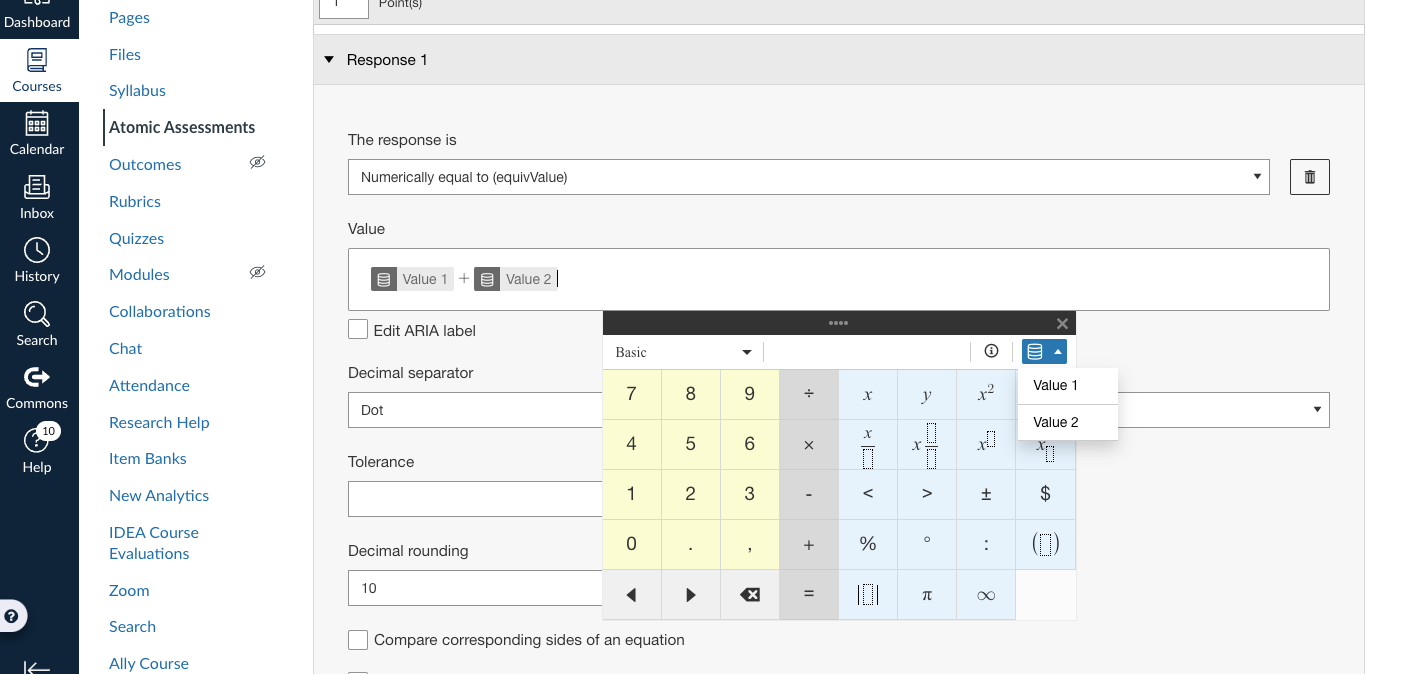
- Double click the formula box
- Write out your formula
- Add in your variables by clicking on the Data Table dropdown (see image)
- Click OK
![Formula box highlighted with [Variable 1] + [Variable 2] and with an arrow pointing at an expanded dropdown to the right side of the formula.](/teach/images/aa-math-formula-variables.png)
Expand the Response 1 dropdown

Select Numerically equal to (equivValue) in "The response is" field
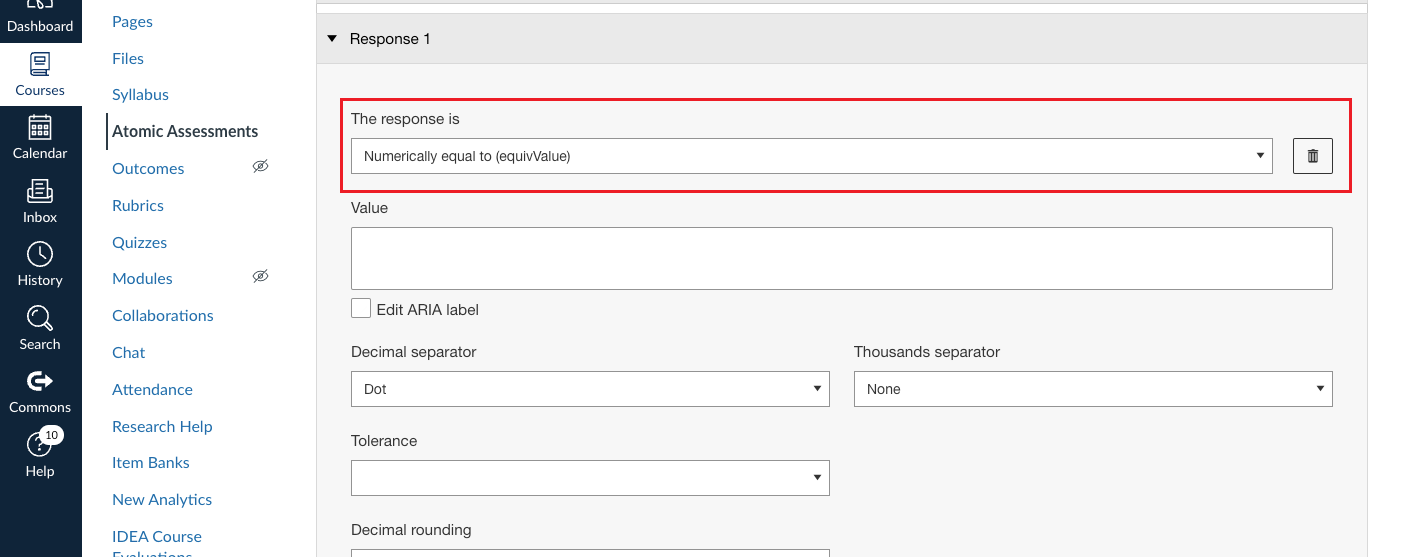
Complete the Value field by entering in the same formula you entered in for the Formula Template (without the '=')
Enable any other desired settings, then scroll up to the top and click Save
You can access more settings by expanding the More options dropdown.
Review the question by clicking on the Preview tab in the top-right corner
To make sure that the formulas work correctly, you can enter the answer in the box, where it will confirm that your input is correct.
Advanced Features
If you have some coding background and would like to incorporate JavaScript into your Data Tables to help you generate data within your columns, you can use the Script feature to accomplish this.
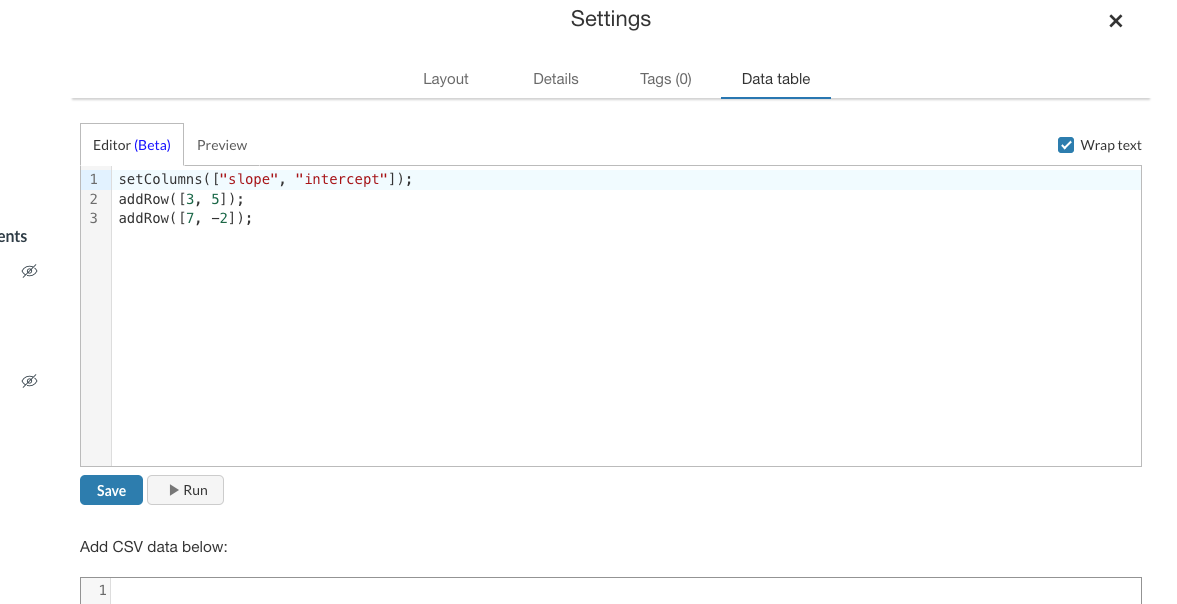
Item Data Table Scripts
An item data table script is a script associated with an Atomic Assessment item that can be run to update the data table for the item. Atomic Assessment data table scripts support Javascript format and provide functions to specify the names of the data table columns (setColumns) and to add rows to the table (addRow).
To create and use a datatable script for an item:
Click Add Script
Enter a script that specifies the columns and rows for the data table
For more information, see the information found in the Data Table Script API and subsequent sections below.
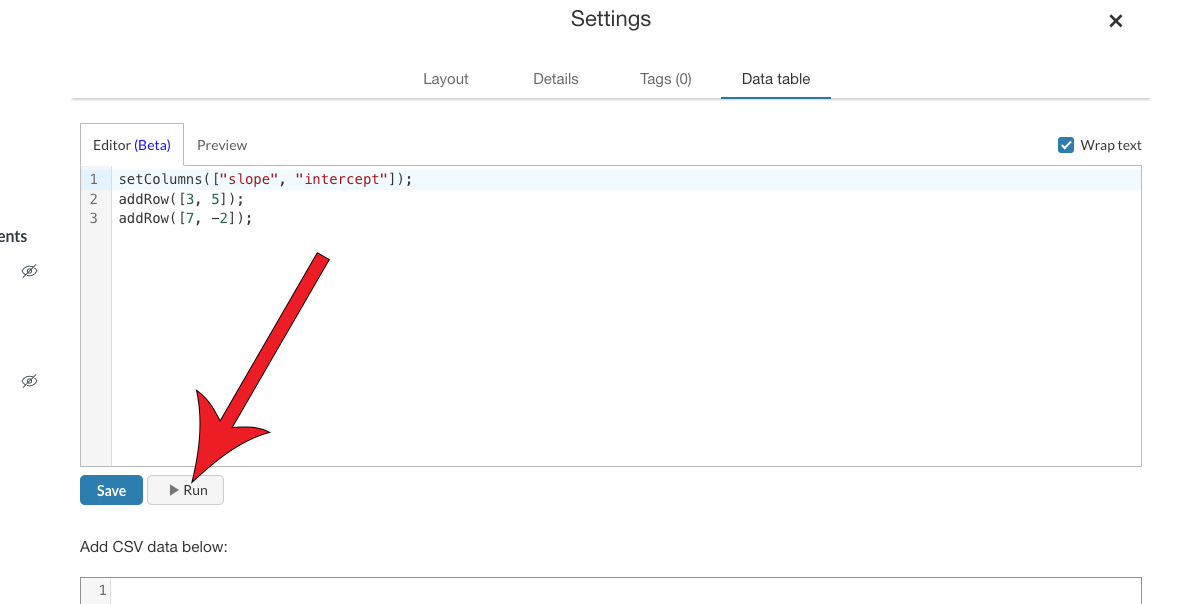
Run the script
Click on the Preview tab to review the results

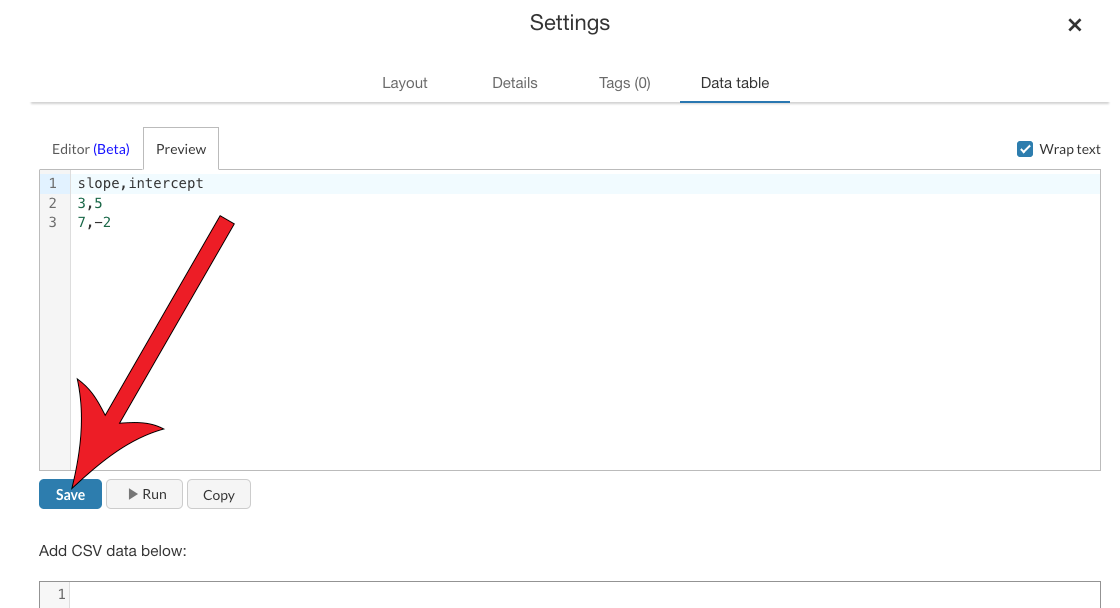
Click Save if the data appears to be correct
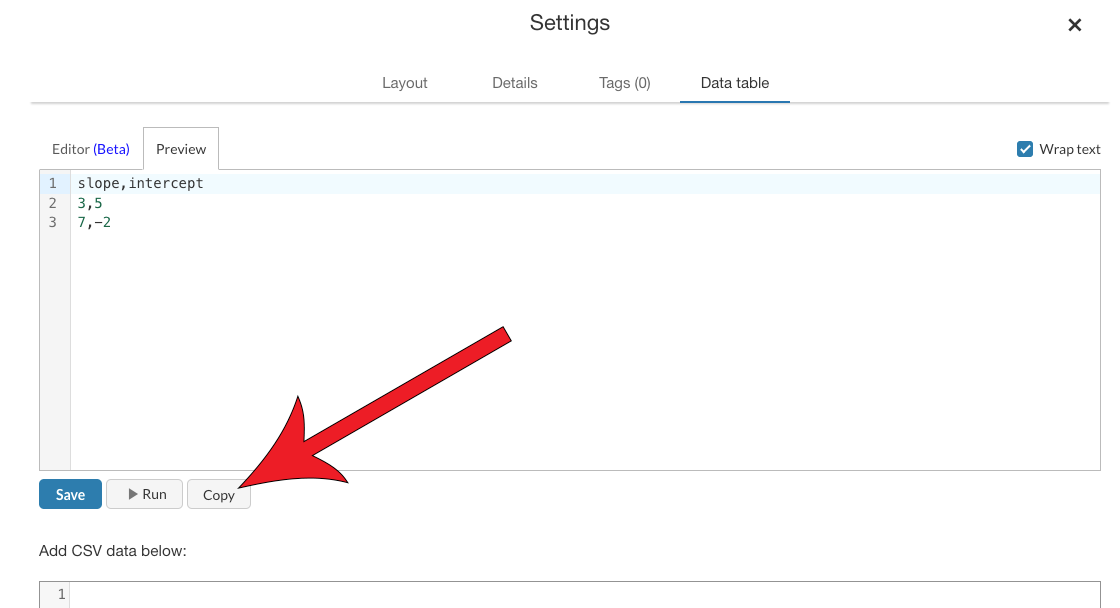
Click Copy
Doing so will copy CSV results into the field that says "Add CSV data below" and will automatically put it into a data table form.
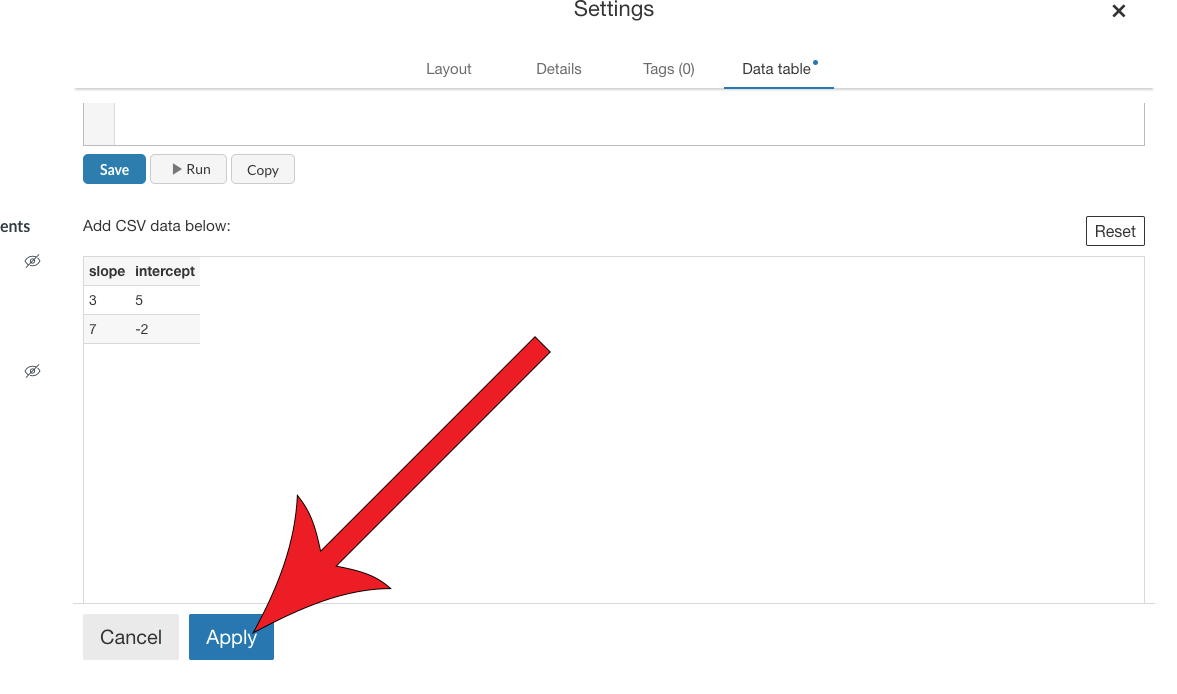
Click Apply
Data Table Script API
Data table scripts can use most Javascript functions. In addition, Atomic Assessments defines functions that you need to use to specify the column names and the row values for a data table:
- setColumns(column_names) - Specifies the names of the data table columns.
- column_names must be an array of strings specifying the names of the data table columns.
- addRow(row_cell_values) - Adds a row to the data table.
- row_cell_values must be an array of values for the row being added. It must have the same number of elements as the array passed to setColumns.
In addition, it defines two functions for generating random values.
- getRandom() - Generates a random number between 0 and 1.
- seed(seed_value) - Specifies the seed for the random number generator.
- seed_value value to seed the random number generator with. It must be a number.
If you do not call the seed_value function or call it with different values, each time you run your script, the randomly generated values will be different. It is important to use the same seed each time so that your table values will remain the same. It is important to not change your data table values between the time when students take an assessment and when you score or rescore it.
Simple Script Example
When you run this script, it will generate a data table with two columns, named slope and intercept and two rows with values 3,5 and 7,-2.
Random Generation Example Script
More commonly, you will use loops to generate multiple rows by randomly generating numbers or selecting from lists. For example:
Running this table will generate a table with three columns named color, slope, and intercept and 10 rows, with randomly generated values.
Course Level Scripts
To avoid repeating and maintaining the same code in multiple item scripts, you can write code at the course level that will be prepended to your item scripts before they are run. This can be a good place to put helper functions. You can also bulk test and run all item scripts in a course from this screen.
To use course level scripts:
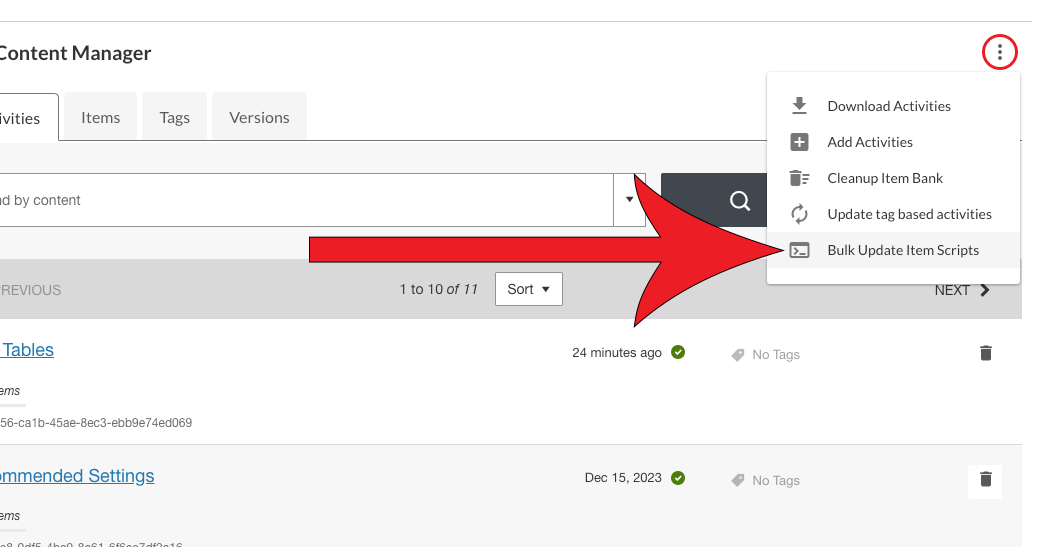
Navigate to the Content Manager in Atomic Assessments

Click More Options (the 3 dot menu) and select Bulk Update Item Scripts
Enter your script into the editor

Click Save

Additional Resources
- This page contains content modified from Atomic Assessments Dynamic Questions, Data Tables, and Data Table Scripting Opens External Link page