Automatically Record Zoom Meetings
While scheduling an event, find the Meeting Options section and locate Record the meeting automatically. Make sure that box is checked and choose whether to save to the Cloud or locally on your computer. This will activate an automatic recording for that meeting.
Automatically Record All Meetings on Your Account
If you would like all of your meetings to be automatically recorded, follow the instructions below:
Go to zoom.usu.edu and sign in to your account
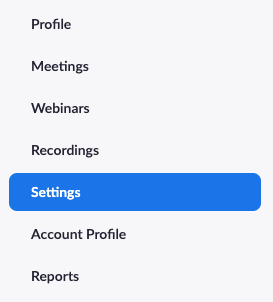
Navigate to the Settings tab
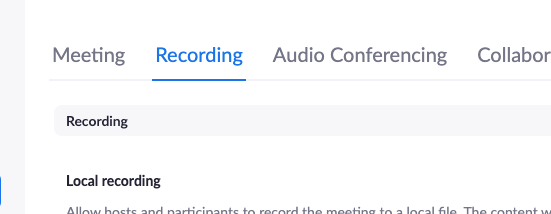
Select the Recording tab at the top
Scroll down and locate Automatic recording and toggle it on
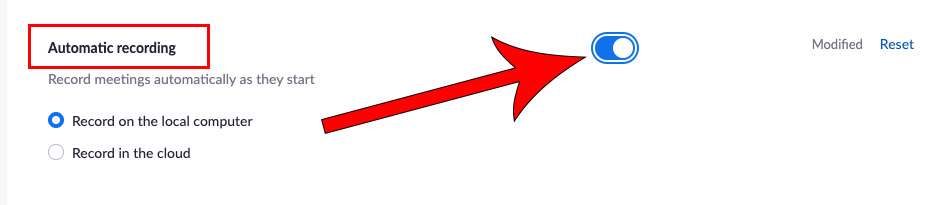
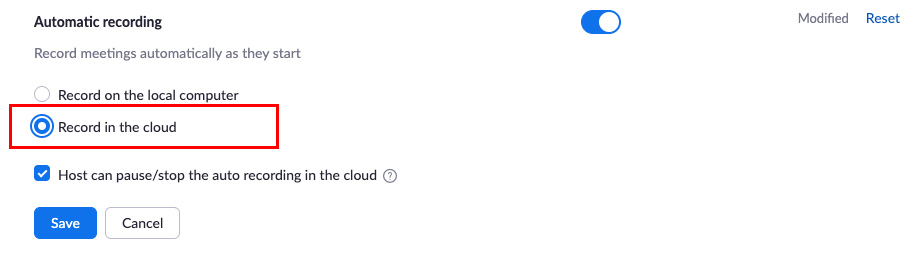
Select whether you want them saved to the Cloud or locally on your computer
Unless you have a specific reason to do so, we recommend that you choose to have them saved to the Cloud. Then, click Save.
Note that automatic recordings begin the moment anyone joins the meeting. If you have Allow participants to join anytime turned on and students join the call early, that will be captured in a recording.
Edit Scheduled Connect Class Meeting for Automatic Recording in Zoom
If your classes Zoom meeting has already been created, follow these steps to enable automatic recording in all future occurrences of that meeting.
Important: In the case of a Connect course, please be sure to edit the existing meeting. Do not delete your current meeting and try to replace it. Do not change any other settings in your Connect class meetings.
Navigate to your Canvas course
Click on the Zoom link

Click the scheduled meeting title

Click the Edit this Meeting button

Check the box for Record the meeting automatically

Ensure that the recording will be In the cloud

Click Save
