Create a Canvas Course Homepage with Design Tools
Figuring out how to design and create a course homepage can be challenging. Whether you are starting from scratch, or you simply want to customize the homepage that you have imported through the USU template or from previously taught courses, Design Tools has many helpful tools to help get your homepage looking exactly how you would like it to.
Design Tools is fairly robust and can allow you to customize your page in lots of different ways. For additional information, be sure to check out the other resources listed in the Additional Resources section found at the bottom of this page.
Add a Canvas Theme
Design Tools has several aesthetic templates that you can add to your course homepage for a quick start.
Step-by-step:
Select Pages in the side navigation bar

Click the + Page button

Enter a page title

Open DesignPLUS (rocket ship icon)

Click the Theme button

Click Front Page

Open the Style dropdown

Select Standard Themes

Choose a theme from the lis

Click Save to apply your changes
Customize Course Number and Title
After selecting a theme, the generic template information will need to be updated. Sometimes, trying to edit the information directly through the Canvas content editor can cause unsuspected issues. Below are the steps on how to properly update the course number and title of the homepage using the features in Design Tools.
Step-by-step:
Click Edit on your Home Page

Open the DesignPLUS dropdown

Click the Edit Current Element tab

Select Banner Title

Enter the course information
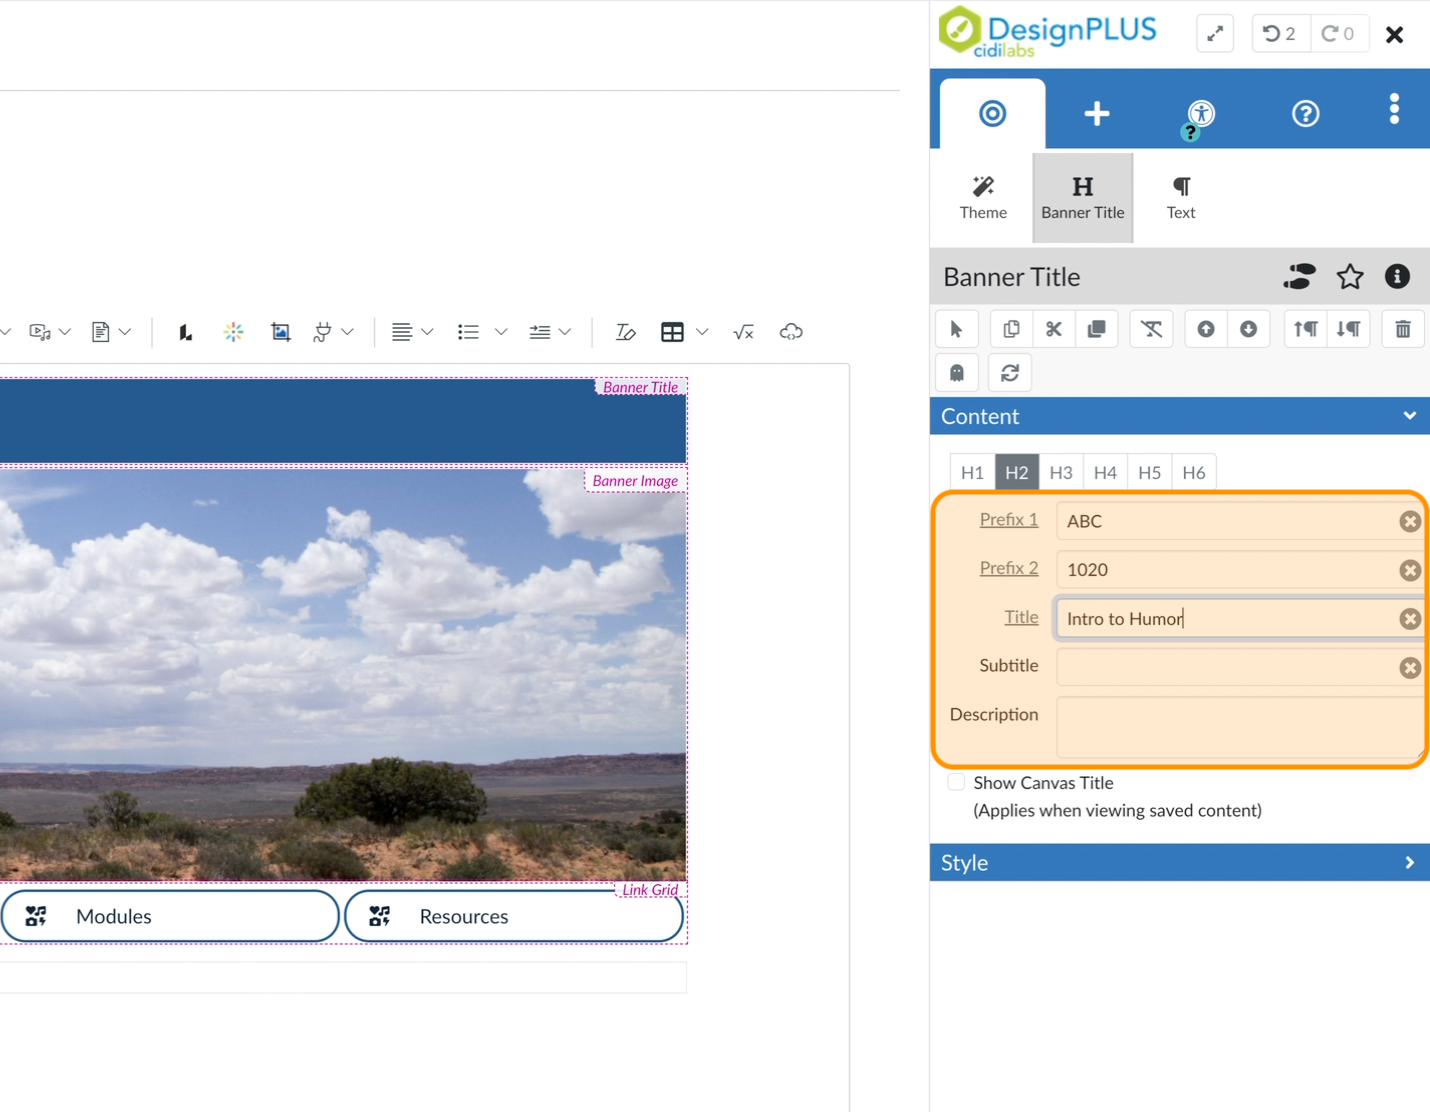
Click Save

You should now see the changes reflected on the course home page

Adding a Module List
If you want a list of modules available on the homepage, you need to build them on the Modules page first. (See the Canvas Modules Overview for more information.) Then, come back to these instructions.
If you are importing content from a previous course and would like to quickly update the module list information, see the following resources:
Step-by-step:
Click the Edit button on your Canvas course

Open the DesignPLUS dropdown

Click the + (Add New Elements) tab
Place your cursor where you would like to insert the new element

Search for module then click on Module List under Navigation

Click the calendar icon

Enter the Start and End dates for the module

Click the down arrow to copy the date pattern to future modules
Click the Advanced dropdown
Click All

Select a Quick Links style from the list of available options

Click Save

Your course home page should now reflect the changes made.

Customizing the Banner Image
You can further customize your course homepage by changing the banner image to something more relevant to the course you are teaching.
If you aren't already in the content editor, click on the Edit button on the page.
Step-by-step:
Click on the banner image to select it
To confirm that you have selected the image, there will be popout that says Image Options.

Click the Upload / Embed Image icon in the toolbar

Select the image source
When selecting an image to use, we recommend using one that is landscape-oriented.
Computer: Upload an image from the files on your computer.
Canvas: Upload an image that you have previously uploaded to your Canvas course.
Unsplash.com: Search images in this free stock photo library.
Pexels.com: Search images in this free stock photo library.
Public URL: Paste the URL of the image source.
Navigate to the Crop Image tab
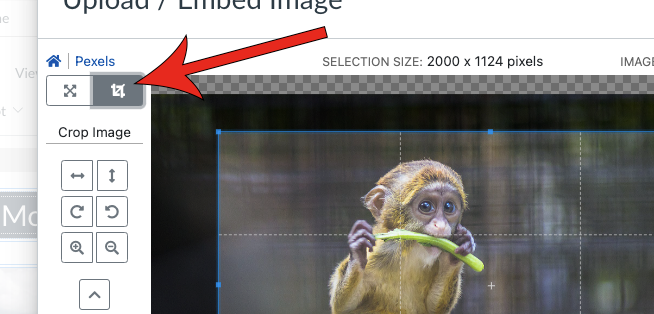
Expand the Image Ratio dropdown and select 10:3
If the crop preview doesn't appear, repeat steps 5 and 6.
We recommend a ratio of 10:3 because it fits neatly on the homepage and doesn't take too much space, leaving room for your students to more quickly find necessary links and information.

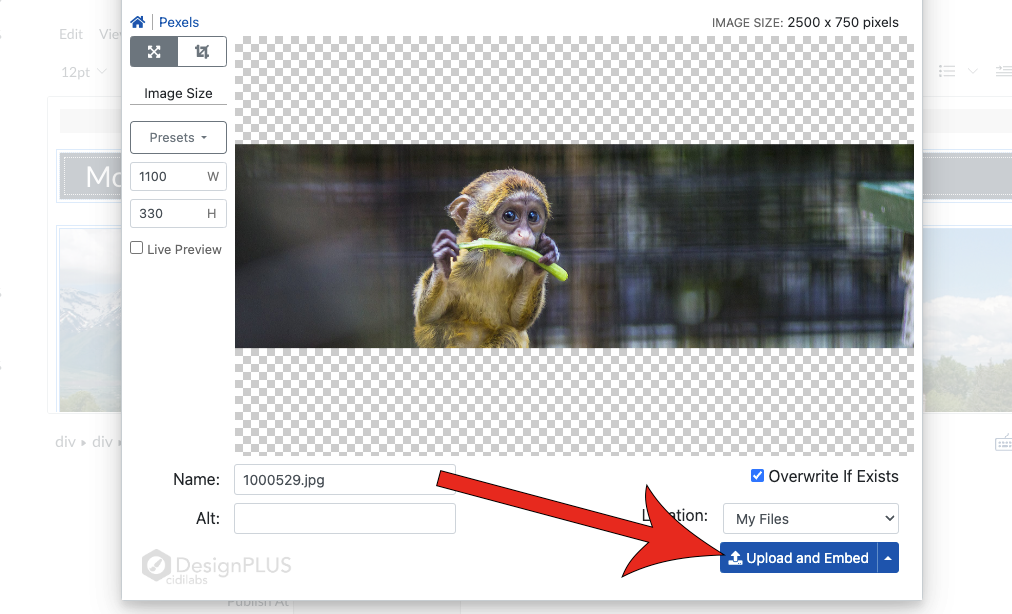
Adjust the image as necessary
We recommend that you fit as much of the image into the highlighted portion of the editor. You can easily adjust it by clicking and dragging each of the corners to expand the box to the edges of the image. Everything outside of the highlighted section will be cut out as you proceed to the next step.

Click Crop Image

Click Upload and Embed
Adding Instructor and TA Information
Another optional feature that you can include on your homepage is to include your information as well as any of your TA's. This can help your students quickly find your contact information.
Step-by-step:
Click Edit on your Canvas home page

Place your cursor inside the edit window

Open DesignPLUS with the shortcut at the top

Search for User Details, then select the User Details card

Open the Content dropdown
Select a Role and ensure the data shown is correct

After the correct information has been entered, click Save

Your Canvas home page should now display your contact information

Additional Resources
In addition to the instructions found on this page, there are several other helpful pages when it comes to editing and enabling your homepage: